Rural intersection: alternative layouts
Total video time: 8:34
Last updated: 2026-01-06
 Alternative layouts
Exercise files: rurl-int-prjct-wid-edglin-ali-end-data-c3d16.zip
Start with: 12345678\Design\aliprofs\AliProf-25.dwg
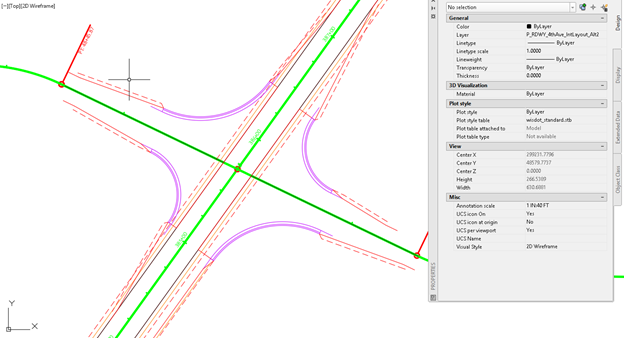
- Set the layer to P_RDWY_4thAve_IntLayout_Alt1
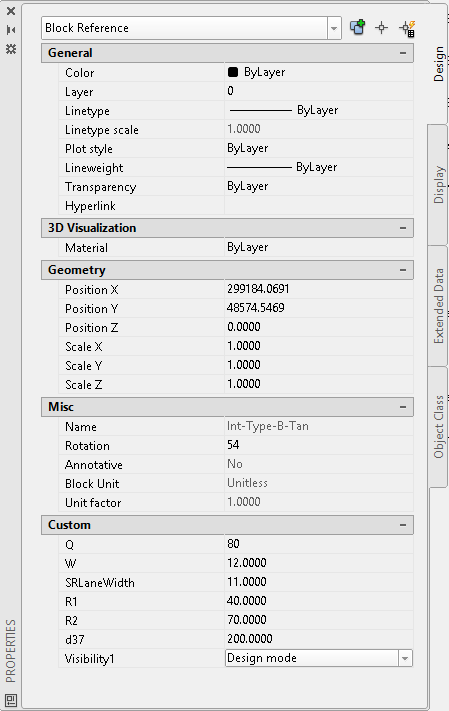
- WisDOT Design tab > Parametric Design > Intersection Blocks > Int-Type-B-Tan
-
The insertion point is the intersection of main line centerline and ETW of side road
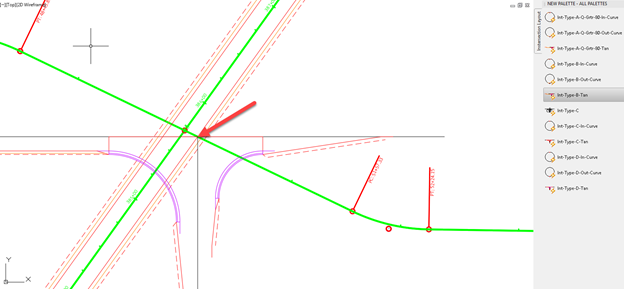
-
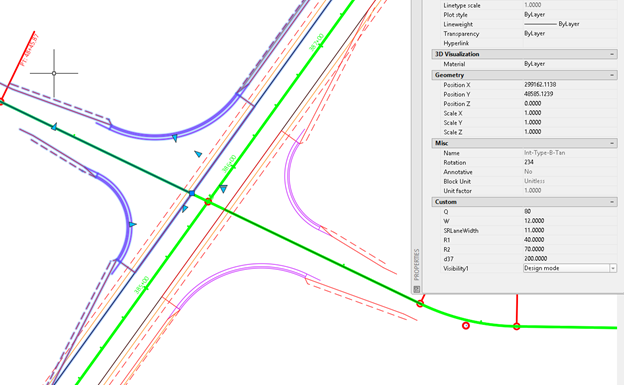
Rotate > select the block > select the insertion point for the base > select a point along the ETW alignment
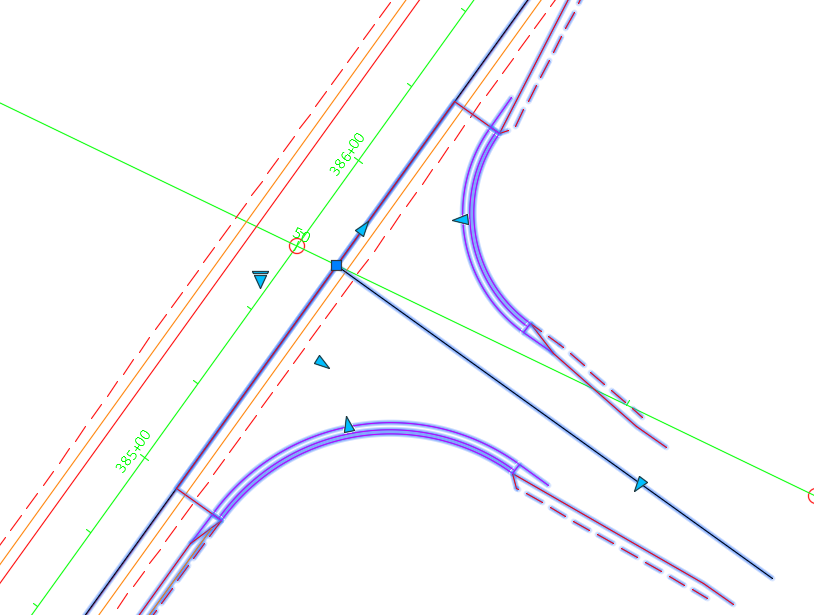
-
Set the intersection angle by dragging the triangular grip over to the side road alignment
- Adjust the lane width in the Design tab of the properties block
-
Use the Standard detail drawing to determine the Radii based on the Q value
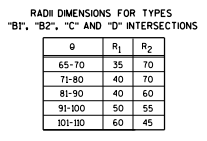
Info: Standard detail drawings can be found at https://wisconsindot.gov/rdwy/sdd/sd-09a01.pdf#1
-
Repeat the steps with the west side of the intersection
- Set the current layer to P_RDWY_4thAve_IntLayout2
- Copy the east intersection to a new layer
- Select the intersection block
- Home tab > Layer ribbon > Copy to layer
- Select the Alt2 layer to copy to
- Select the base point and then select the point again
- Turn off the Alt1 layer
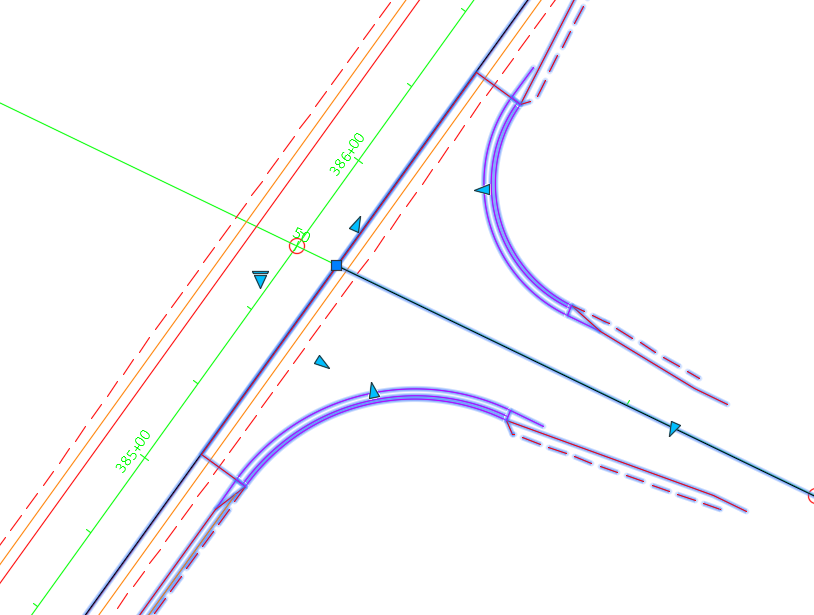
- Insert a Type D intersection block on the west side of the road
- Rotate it in place
- Set the intersection angle
- Set the side road width to 11'
- Set the W value to the width of the shoulder or 5'
- Set R1 to 40' and R2 to 70'
-
Now you can toggle between the alternatives by turning on and off the layers