Rural intersection: grading behind curb and gutter with corridor
Total video time: 9:40
Last updated: 2026-01-06
In this session we will continue with a series of optional additions to the design by adding an alignment and profile target for ditch control. This will provide a greater amount of control as deign changes are needed later on. This is optional and only need if you are concerned with specific clearances such as pipe clearances or other specific situations that require a higher level of precision.
 Create ditch alignment
Exercise files: rurl-int-grdg-bhnd-cg-fl-end-data-c3d16.zip
Start with: 12345678\Design\Corridors\Crdr-25-4thAve.dwg
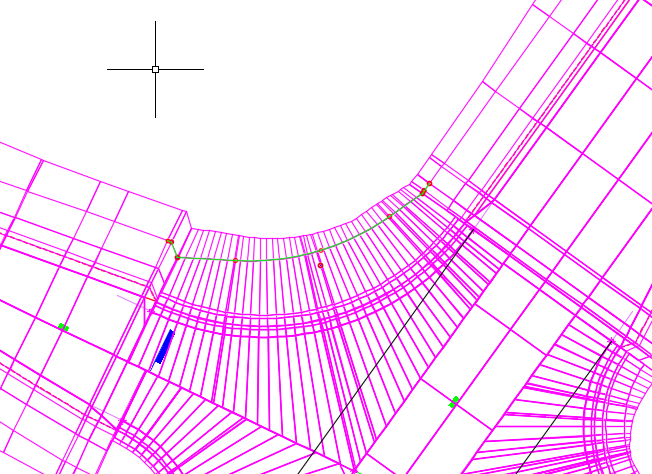
Starting in the NW quadrant the curb daylights far before the rest of the corridor. Here we would want to add a ditch that matches up with whats going on with the rest of the corridor.
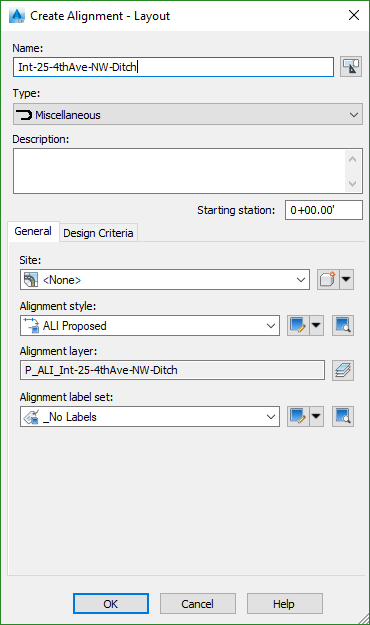
- Home tab > Create Design > Alignment > Alignment Creation Tools
- Name it Int-25-4thAve-NW-Ditch
-
Alignment Style > ALI Proposed
-
Tangent Tangent (No curves)

-
Select along the edge of gravel surface starting and ending a ways into the corridor to help it blend in. The further back you select the more lead in you have and you can tell a better story as you are trying to design the profile.
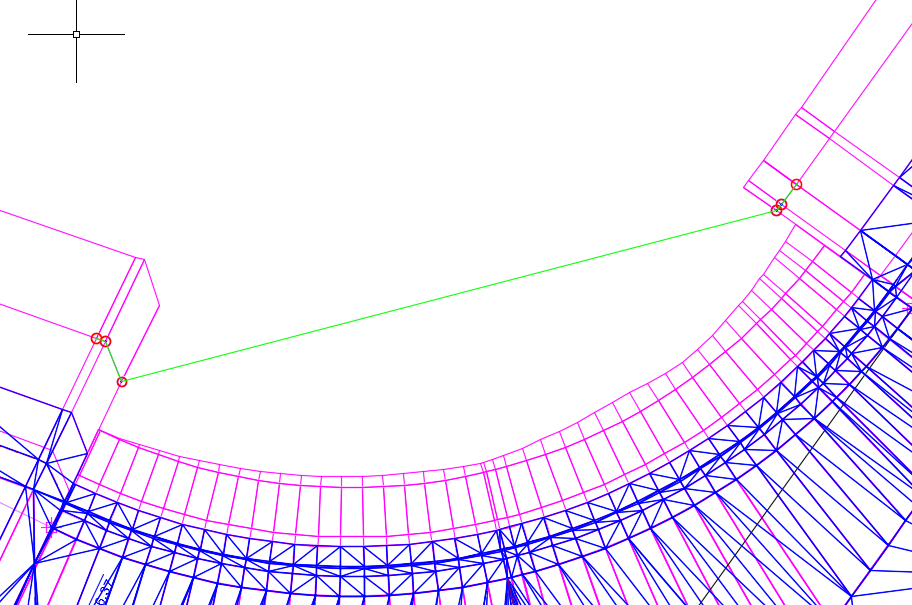
- Insert a PI somewhere along the middle- it can be adjusted later
-
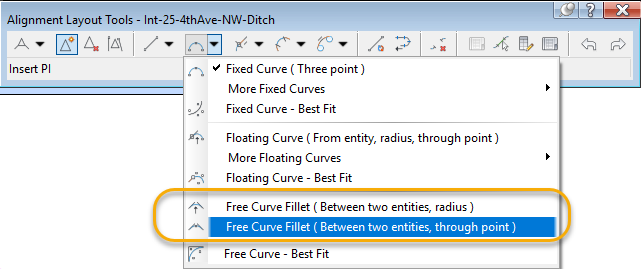
Select Free curve fillet between two entities or Radius if you know the radius
-
Select two points along the curve as it approaches and leaves the PI
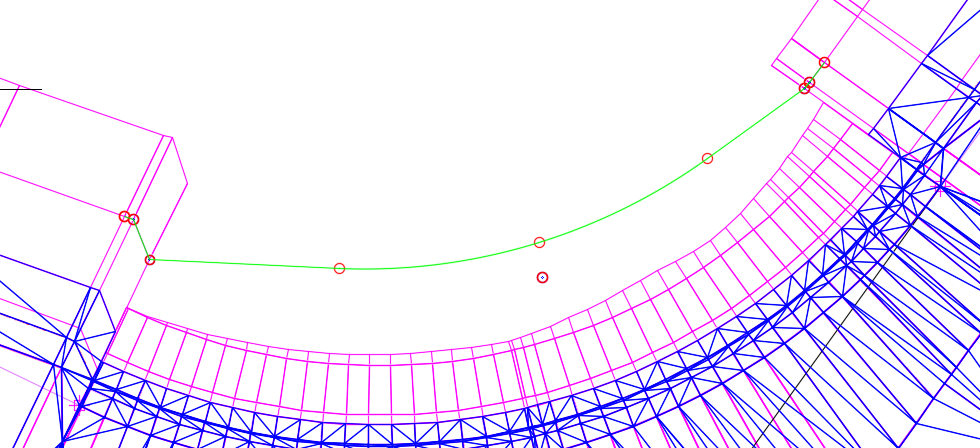
- Save for use in the next exercise
Create ditch profile
Exercise files: Continue with data set or start with: rurl-int-grdg-bhnd-cg-fl-end-data-c3d16.zip
Start with 12345678\Design\Corridors\Crdr-25-4thAve.dwg
Even though this will be a proposed surface we will create a profile from surface
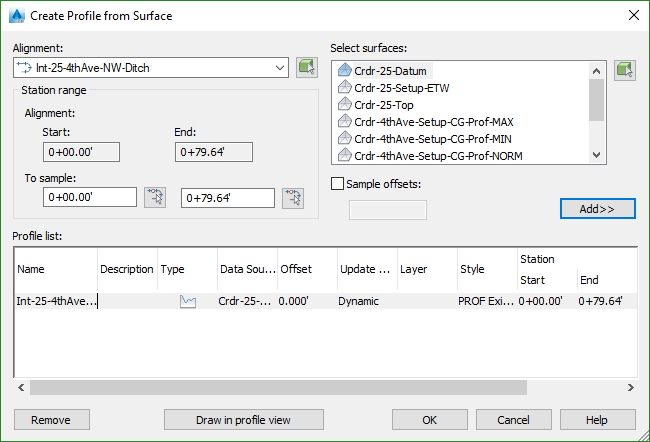
- Home tab > Create Design > Profile > Create Profile from Surface
-
Alignment > Int-25-4thAve-NW-Ditch
-
Select Surfaces > Crdr-25-Datum Add > Draw in Profile View
- Profile > Profile Creation Tools
- Select the defaults
- Draw tangent to tangent no curves
-
Snap to each of the points
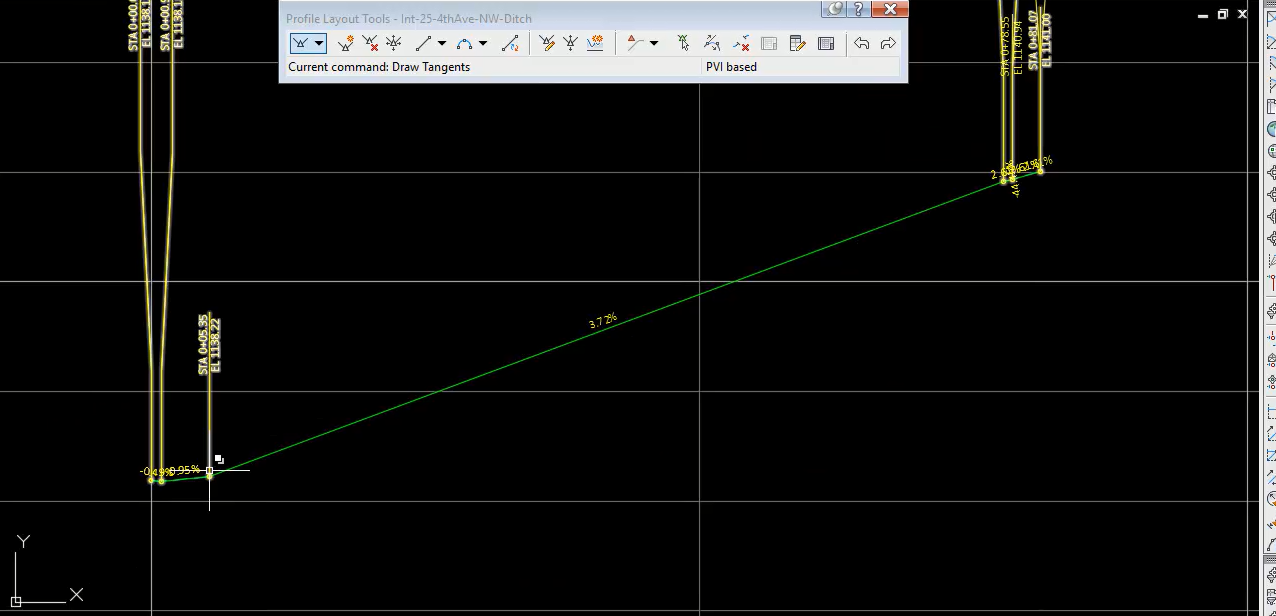
- Save
Target parameters
Exercise files: Continue with previous data set of start wit:rurl-int-grdg-bhnd-cg-fl-end-data-c3d16.zip
Start with 12345678\Design\Corridors\Crdr-25-4thAve.dwg
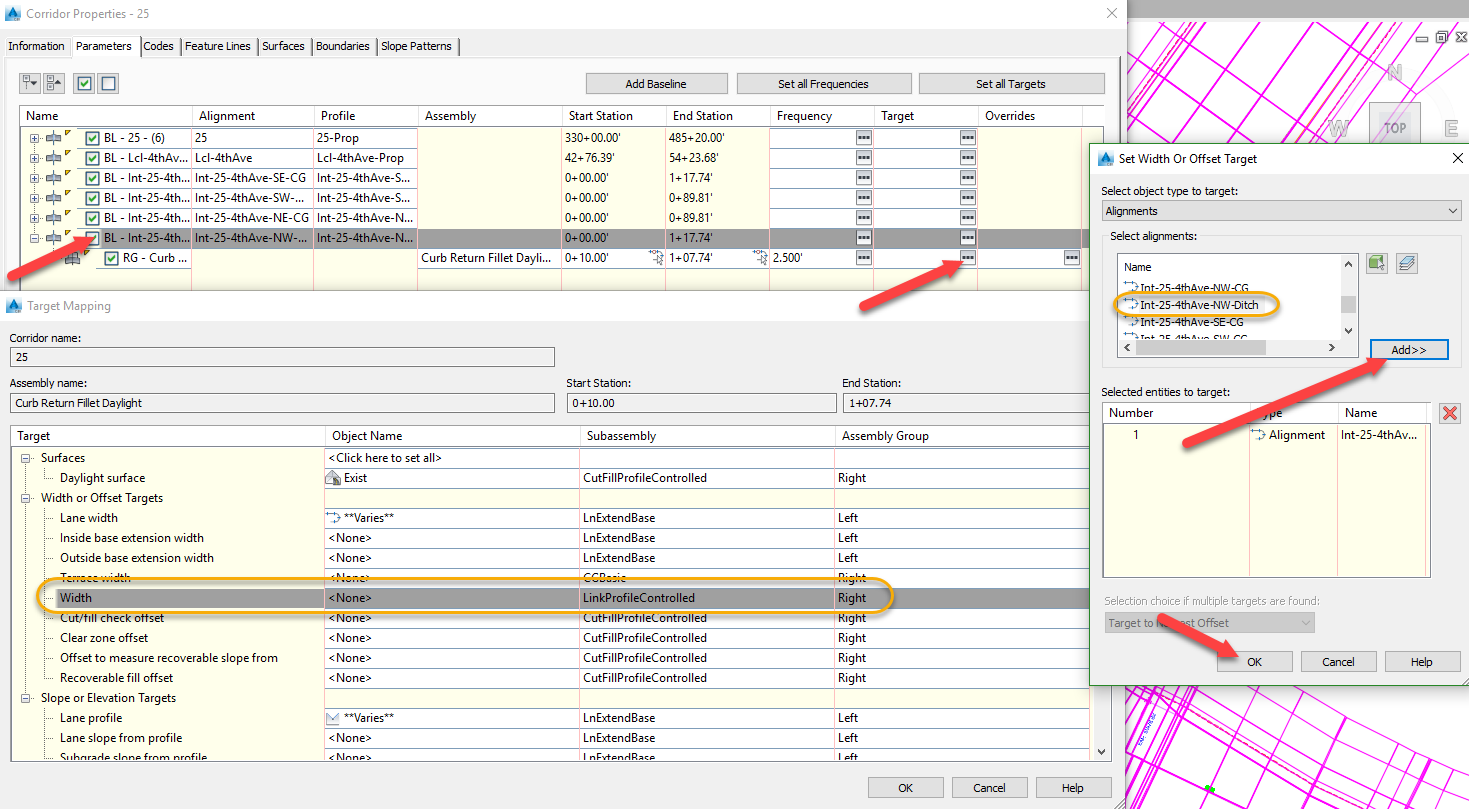
- Highlight the corridor > corridor properties > NW quadrant > Targets
- Width of Offset dropdown > Width > LinkProfileControlled > OK
-
Int-25-4thAve-NW-Ditch > Add > OK
-
Elevation > LinkProfileControlled > Int-25-4thAve-NW-Ditch > Add > OK
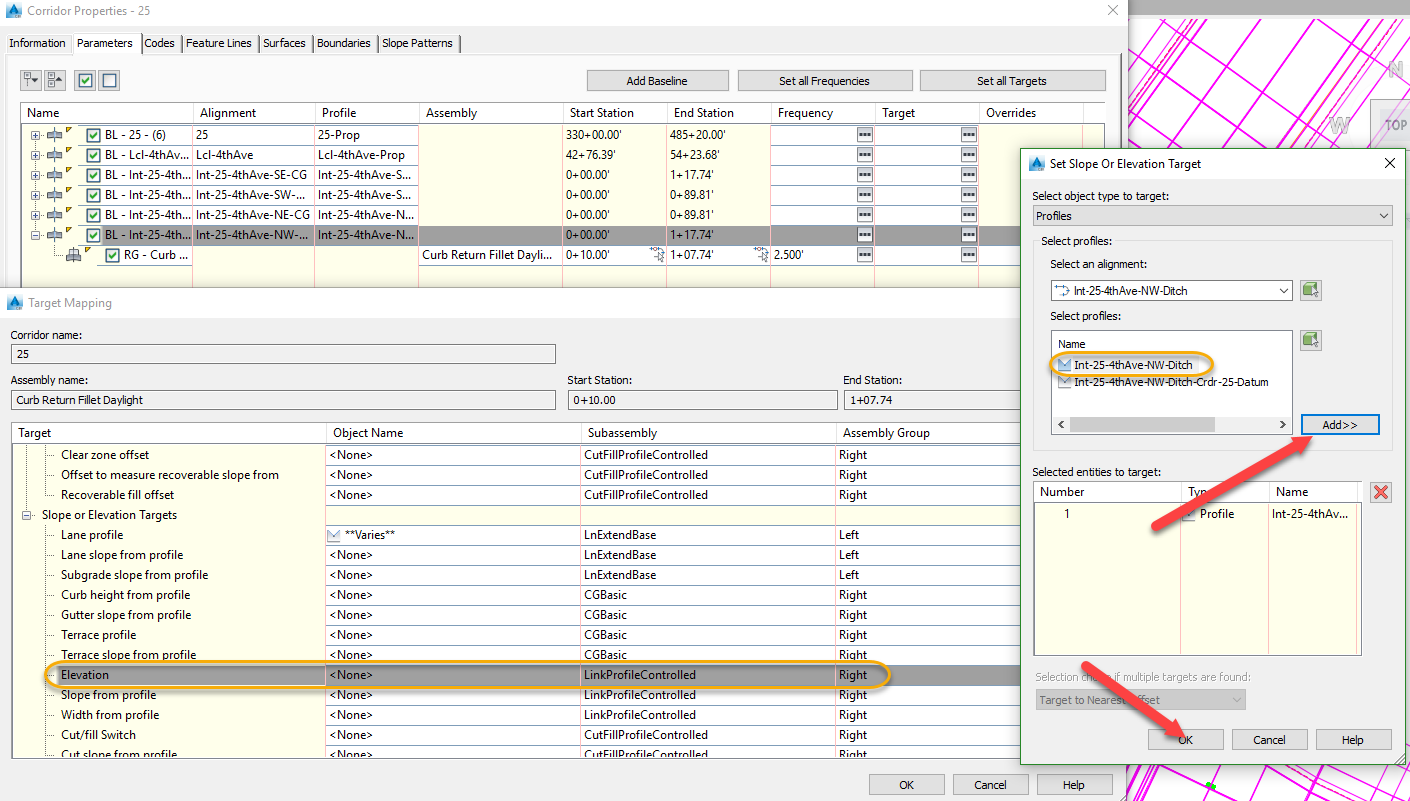
-
OK > OK > Rebuild Corridor
Synchronize refinement datum surface
Exercise files: Continue with previous data set of start with: rurl-int-grdg-bhnd-cg-fl-end-data-c3d16.zip
Start with 12345678\Design\Corridors\Crdr-25-4thAve.dwg
This has changed the way the corridor surface area is built in this area so first save the file to force the changes onto the refinement surface. Open the Rfnt-All-Datum file to synchronize.
- Prospector tab > Surfaces > right click Crdr-25-Datum > Synchronize
- Right click Rfnt-25-Datum > Rebuild
- Save