Data extraction wizard
Last updated: 2026-01-06
Total Video Time: 11:58
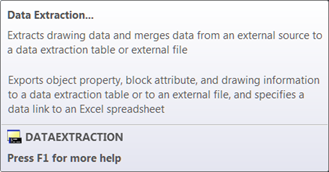
The Data extraction wizard is used to create a data table in the current drawing, or save to an external file (.xls, .mdb or csv), or both. Information is extracted from objects, blocks, and attributes, including drawing information in the current drawing or a set of drawings.
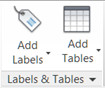
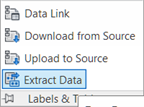
Navigate to the Annotate ribbon > Label & Tables > Extract Data
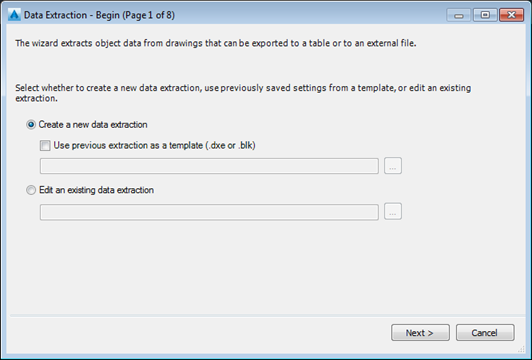
Begin
- The first dialog of the data extraction process. Options include creating a new data extraction file, using a template, or editing an existing data extraction file.
- Define Data Source- Specifies the drawing files, including any additional folders from which to extract data. Allows selection of objects in the current drawing from which to extract information.
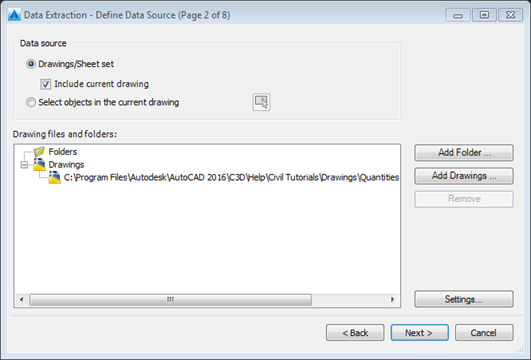
Data Source
• Drawings/Sheet Set - Makes the Add Folder and Add Drawings buttons available for specifying drawings and folders for the extraction. Drawings and folders for the extraction are listed in the Drawing Files view.
• Include Current Drawing - Includes the current drawing in the data extraction. The current drawing can be empty (not contain objects) if additional drawings are selected for extraction.
• Select Objects in the Current Drawing - Makes the Select Objects in the Current Drawing button available so you can select objects for data extraction.
• Select Objects button - Closes the wizard temporarily so that you select objects and blocks in the current drawing.
• Drawing Files and Folders - Lists the selected drawing files or folders. Checked folders are included in the extraction.
• Add Folder - Displays the Add Folder Options dialog box, where you can specify folders to include in the data extraction.
• Add Drawings - Displays the standard file selection dialog box, where you can specify drawings to include in the data extraction.
• Remove - Removes the checked drawings or folders listed in the Drawing Files and Folders list from the data extraction.
• Settings - Displays the Data Extraction - Additional Settings dialog box, where you can specify data extraction settings.
Folders Shortcut Menu (right-click)
This menu is only activated after you explicitly add a folder using the Add Folder button.
• Edit Folder Settings - Displays the Add Folder Options dialog box where you can specify the folders to be used for data extraction. Drawings in the selected folders are monitored for data changes.
• Remove - Removes the selected folder.
• Check All - Selects all the drawings listed below the selected folder.
• Uncheck All - Clears all the drawings listed below the selected folder.
• Invert Selection - Inverts the current selected items below the selected folder.
- Select Objects- Specifies the types of objects (blocks and non-blocks) and drawing information to be extracted.
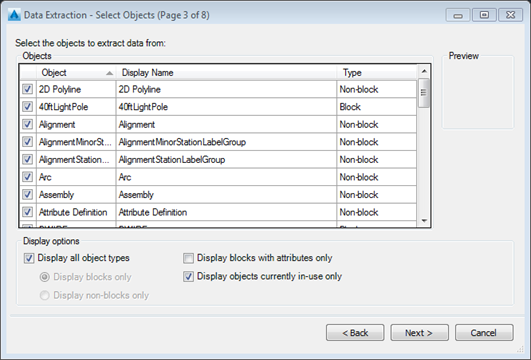
Objects
• Object - Displays each object by its name. Blocks are listed by block name. Non-blocks are listed by their object name.
• Display Name - Provides a place to enter an optional alternative name for an object as it will appear in the extracted information. Select a display name, right-click in the list, and click Edit Display Name.
• Type - Displays whether the object is a block or non-block.
• Preview - Displays a preview image of the checked block in the Object list view.
Display Options
• Display All Object Types - Displays a list of all object types (blocks and non-blocks) in the Object list view. This option is selected by default.
• Display Blocks Only - Displays only blocks in the Object list view.
• Display Non-Blocks Only - Displays only those objects that are not blocks in the Object list view.
• Display Blocks with Attributes Only - Displays only those blocks in the Object list view that contain attributes. Dynamic blocks are listed if they have special properties assigned to them (for example, actions and parameters).
• Display Objects Currently In-Use Only - Displays objects in the Object list view that exist in the selected drawings.
- Select Properties- Controls the object, block, and drawing properties to extract. Each row displays a property name, its display name, and category. Right-click a column head and use options on the shortcut menu to check all or clear all items, invert the selection set, or edit the display name. Click the column head to reverse the sort order. Columns can be re-sized.
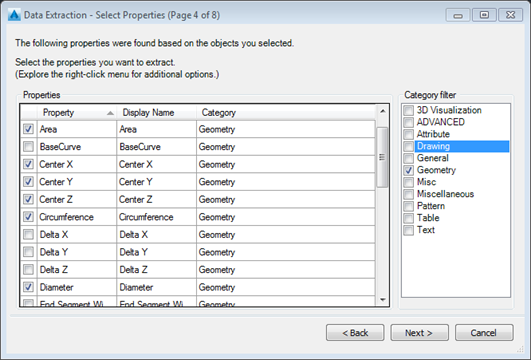
Properties
• Property - Displays object properties from objects selected on the Select Objects page. The property list is filtered according to the filter categories that are selected. Properties are the same as those listed in the Properties palette.
• Display Name - Provides a place to enter an optional alternative name for a property as it will appear in the extracted information. Select the property display name, right-click in the list, and click Edit Display Name.
• Category - Displays a category for each property. For example, General designates ordinary object properties, such as color or layer. Attribute designates user-defined attributes. Dynamic designates user-defined property data for dynamic blocks. Categories are the same as those listed in the Properties palette.
Category Filter
• Property Category List - Displays a list of categories that are extracted from the property list. Unchecked categories filter the Properties list. Categories include 3D Visualization, Attribute, Drawing, Dynamic Block, General, Geometry, Misc, Pattern, Table, and Text.
Property Grid Shortcut Menu
• Check All - Selects all the properties in the property grid.
• Uncheck All - Clears all the properties in the property grid.
• Invert Selection - Inverts the current checked items in the property grid.
• Edit Display Name - Allows in-place editing of the property display name for the selected row.
- Refine Data- Modifies the structure of the data extraction table. You can reorder and sort columns, filter results, add formula columns and footer rows, and create a link to data in a Microsoft Excel spreadsheet.
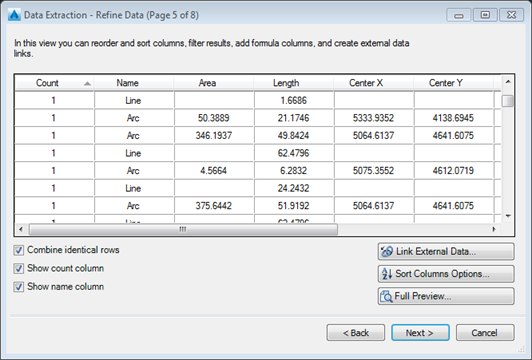
Data Grid View
• Columns - Displays properties in a columnar format as they were specified in the Select Properties page. Right-click any column header to display a shortcut menu of options. The Count column and Name column display by default. Icons display in the column header for inserted formula columns and columns extracted from a Microsoft Excel spreadsheet.
• Combine Identical Rows - Groups identical records by row in the table. Updates the Count column with the sum of all aggregated objects.
• Show Count Column - Displays the Count column in the grid.
• Show Name Column - Displays the Name column in the grid.
Link External Data
Displays the Link External Data dialog box, where you can create a link between the extracted drawing data and data in an Excel spreadsheet.
Sort Columns Options
Displays the Sort Columns dialog box, where you can sort data across multiple columns.
Full Preview
Displays a full preview of the final output, including linked external data, in the text window. The preview is for viewing only.
Column Shortcut Menu
• Sort Descending - Sorts column data in a descending order.
• Sort Ascending - Sorts column data in an ascending order.
• Sort Column Options - Displays the Sort Columns dialog box, where you can sort data across multiple columns.
• Rename Column - Allows in-place editing of the selected column name.
• Hide Column - Hides the selected column.
• Show Hidden Columns - Displays the hidden column. The flyout option includes Display All Hidden Columns.
• Set Column Data Format - Displays the Set Cell Format dialog box, where you can set a data type for cells in the selected column.
• Insert Formula Column - Displays the Insert Formula Column dialog box, where you can specify the formula that is inserted into the table. Inserts the formula column to the right of the selected column. An existing formula column cannot be used as a value for another formula column.
• Edit Formula Column - Displays the Edit Formula Column dialog box. This option is only available when a formula column is selected.
• Remove Formula Column - Removes the selected formula column. This option is only available when a formula column is selected.
• Combine Record Mode - Displays numeric data in the selected column as separate values or collapses identical property rows into one row and displays the sum of all the numeric data in the selected column. This option is available when the Combine Identical Rows is checked and the selected column contains numerical data.
• Show Count Column - Displays a Count column that lists the quantity of each property.
• Show Name Column - Displays a Name column that displays the name of each property.
• Insert Totals Footer - Displays a flyout menu with options for Sum, Max, Min, and Average. Creates a footer row for the selected column that is placed below all the data rows and displays values based on the selected arithmetic function. This option is available only for columns that have a numeric data type.
• Sum - Displays a sum of all the values in the selected column in a footer row.
• Max - Displays the maximum value in the selected column in a footer row.
• Min - Displays the minimum value in the selected column in a footer row.
• Average - Displays the average value in the selected column in a footer row.
• Remove Totals Footer - Removes the Totals footer. This option is available when a footer row exists.
Filter Options
Displays the Filter Column dialog box, where you can specify filter conditions for the selected column.
• Reset Filter - Restores the default filter for the selected column.
• Reset All Filters - Restores default filters for all columns that have filters.
• Copy to Clipboard - Copies all the data cells, including column names, to the Clipboard.
- Choose Output- Specifies the type of output to which the data is extracted.
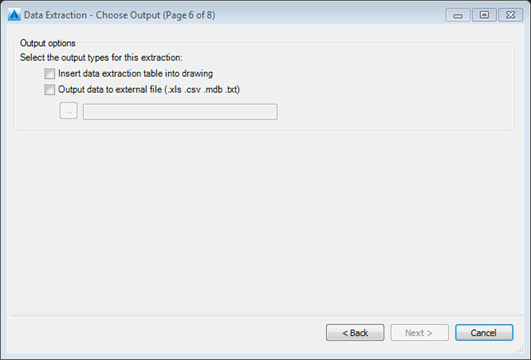
Output Options
• Insert Data Extraction Table into Drawing - Creates a table that is populated with extracted data. You are prompted to insert the table into the current drawing when you click Finish on the Finish page.
• Output Data to External File - Creates a data extraction file. Click the [...] button to select the file format in a standard file selection dialog box. Available file formats are Microsoft Excel (XLS), comma-separated file format (CSV), Microsoft Access (MDB), and tab-separated file format (TXT). The external file is created when you click Finish on the Finish page.
- Table Style- Controls the appearance of the data extraction table. This page is displayed only if AutoCAD Table is selected on the Choose Output page.
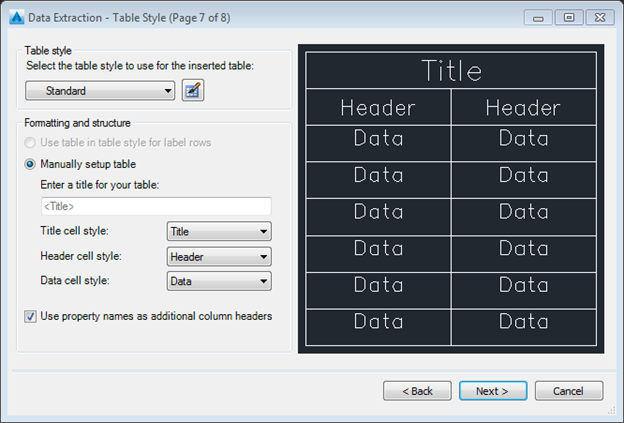
Table Style
• Select the Table Style to Use for the Inserted Table - Specifies the table style. Click the Table Style button to display the Table Style Dialog Box, or select a table style from the drop-down list that is defined in the drawing.
Formatting and Structure
• Use Table in Table Style for Label Rows - Creates the data extraction table with a set of top rows that contain label cells and a bottom set of label rows that contain header and footer cells. Extracted data is inserted between the top and bottom label rows. This option is only available when the selected table style contains a template table.
• Manually Setup Table - Provides for manually entering a title and specification of the title, header, and data cells style.
• Enter a Title for Your Table - Specifies a title for the table. This row is not overwritten when the table is updated. The default table style, STANDARD, includes a title row. If the selected table style does not include a title row, this option is not available.
• Title Cell Style - Specifies the style for the title cell. Click the drop-down list to select a title cell style defined in the selected table style.
• Header Cell Style - Specifies the style for the header row. Click the drop-down list to select a cell style defined in the selected table style.
• Data Cell Style - Specifies the style for data cells. Click the drop-down list to select a cell style defined in the selected table style.
• Use Property Names as Additional Column Headers - Includes column headers and uses the Display Name as the header row.
Display Preview
Displays a preview of the table layout. If the table style does not include a title row or header row, none is displayed.
8. Finish