Earthwork matchlines sheet
Last updated: 2026-01-06
Standards
FDM - Cross Section matchline: FDM 15-1-20.5
WisDOT Civil 3D Project Data Workflow Map
Civil 3D Project Folder Structure: FDM 15-5 Attachment 3.1
Civil 3D Object and File Abbreviation Standards: FDM 15-5 Attachment 3.2
Civil 3D Drawing Naming Convention: FDM 15-5 Attachment 3.3
Civil 3D Object Naming Convention: FDM 15-5 Attachment 3.4
FDM requirements
FDM 15-1-20.5 Earthwork Matchlines: Interchanges and complex intersections should have earthwork matchline details for use in computing cut and fill yardage. The details may be shown separate on a detail sheet or combined with another detail. It should show the stationing and distances to the matchline and other pertinent information necessary to compute the FDM 15-1 Standards Page 12 cut and fill yardage. This detail is not necessary if the matchlines can be properly shown on the cross sections.
Design earthwork matchlines:
The ultimate purpose of the earthwork matchlines sheet is to provide information necessary to compute the earthwork cut and fill yardage. matchlines used here should be developed when computing earthwork quantities. More information on matchline development and design is provided in Earthwork quantities (wi.gov).
Info: The methods to calculate earthwork at intersections and the methods to create cross section sheets at intersections are different. Therefore the matchlines used to calculate earthwork at intersections are different than the matchlines to create cross sections at intersections. The earthwork matchline sheet should display the matchlines used to calculate earthwork.
 Create file
- Civil 3D Start Menu > New > design-start.dwt
- Set annotation scale to desired horizontal scale for the plan sheet
- WisDOT Tab > Manage Panel > Add Component > All components
- Save the file <ProjectID>\sheet\021801-xm.dwg
- Save
Alignment data shortcut references
Alignments are required to create sample line groups and cross section sheets. All alignments that are baselines in earthwork calculations should be data shortcut referenced.
-
Toolspace > Prospector tab > Data Shortcuts area > expand Alignments > expand Centerline > Right-click on the alignment to be referenced > Create Reference
| Alignment | Alignment style | Alignment label set |
|---|---|---|
| SideRoads | ALI Proposed | 1IN 200FT-Ticks 500' Major:100' Minor[DESC] |
| Mainline | ALI Proposed | 1IN 200FT-Ticks 500' Major:100' Minor[DESC] |
Tip: Adjust the label set used for the appropriate annotation scale but make sure to use a [DESC] type alignment label set. Utilize the description within each alignment’s properties to label the alignment.
Delete geometry point alignment labels
The alignment geometry point labels are not required for the cross section matchline sheets. Delete these labels.
- Select any geometry point label
- Right-click > Select Similar
- Delete
Add alignment description
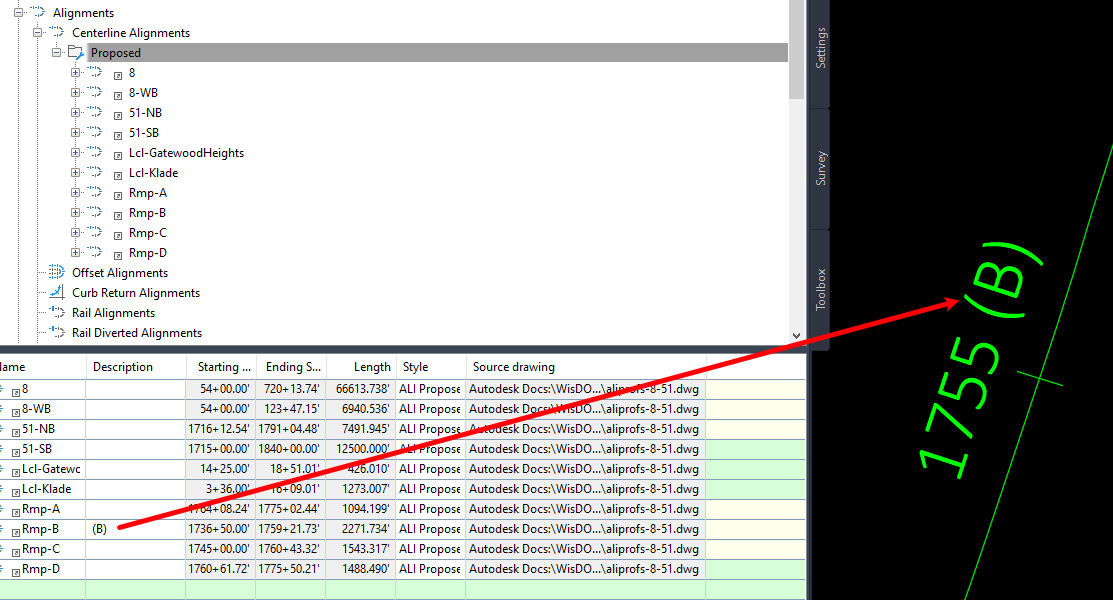
When using the [DESC] alignment label set, descriptions must be assigned to the alignment to be displayed in the alignment station.
- Toolspace > Prospector tab > Alignments > Select Centerline Alignments
- In the preview area below toolspace, apply descriptions to all centerline alignments.

Create data shortcut references of matchlines
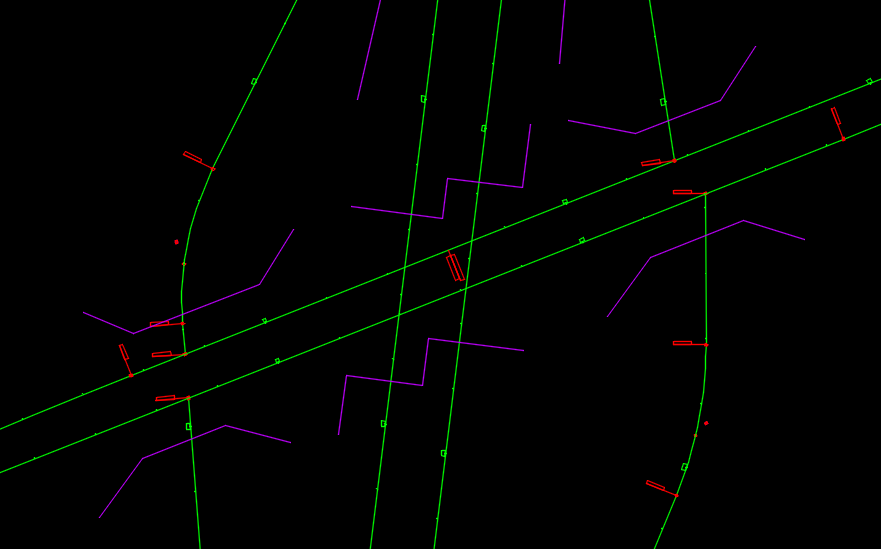
Do not manually create the matchlines in the cross section matchline sheet. The matchlines should be alignments and should come from their source drawing, typically the earthwork calculation Civil 3D drawing via data shortcut reference.
Tip: If the matchline alignments are not available in the data shortcut menu, the data shortcuts to the matchline alignments must be created. Data shortcuts (wi.gov).
- Toolspace > Prospector tab > Data Shortcuts area > expand Alignments > expand Miscellaneous> Right-click on the alignment to be referenced > Create Reference
- Create Alignment Reference Dialog
- Name: Leave Default
- Alignment Style: XS Sample Line
- Alignment Label Set: _No Labels
- OK
-
Repeat for all matchline alignments.

 Add dimension lines
The cross section matchline sheet should show stationing and distances to the matchlines. The easiest way to accomplish this is to draw dimension lines perpendicular to the nearest alignment, or in the case of an interchange or complex intersection, draw dimension lines to the nearest reference alignments, making sure the lines are perpendicular to the alignments. Once the dimension lines are established, dimensions without dimensions lines will be used to label the distances.
- Set active layer to P_MISC_Text
- WisDOT Sheets Tab > Annotation Panel > Set P_MISC_Text
Add dimension lines at matchline vertices
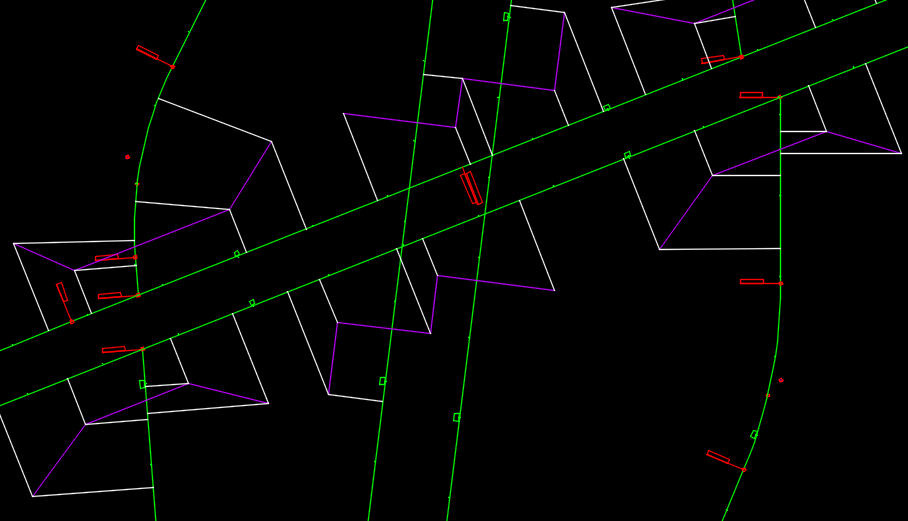
Draw lines from the matchline vertices to the nearest alignments, perpendicular to the alignments.
- Home Tab > Draw Panel > Line
- Use the Endpoint snap to snap to the matchline vertice
- Hold Shift > Right Click > End Point
- Use the perpendicular snap to snap the line to the alignment.
- Hold Shift > Right Click > Perpendicular
Tip: Instead of manually selecting the end point and perpendicular grips at each vertice, use the object snap settings to turn on the end point and perpendicular snaps.

Add dimension lines at every minor alignment station
Add dimension lines at every minor station tick that falls within the matchline range. The frequency of these lines may depend on the final plan sheet annotation scale and the alignment label set being used. There are many different ways to accomplish this. A couple ways are highlighted below.
Copy existing lines that are perpendicular to the base line
This only really works on tangent portions of the baseline alignment.
- Home Tab > Modify Panel > Copy
- Select a line that is perpendicular to the baseline alignment near the location for the new dimension line.
- Enter
- Specify base point: Select the endpoint of the line at the intersection with the baseline.
- Specify second point: Select the intersection of the station tick and baseline. alignment
- Repeat for other station ticks along that tangent portion of the alignment.
- Trim the lines to the matchline
- Home Tab > Modify Panel > Trim
- Commandline: Cutting Edges
- Select objects: Select the matchline alignments.
- Trim: Select the overhangs of the dimension lines.
- Or Extend the lines to the matchline
- Home Tab > Modify Panel > Extend
- Commandline: Boundary Edges
- Select objects: Select the matchline alignments.
- Extend: Select the end of the dimension lines closest to the matchlines.
Station offset transparent command
This method works in all scenarios, but may take time.
- Home Tab > Draw panel > Line
- Specify first point: Snap to the minor/major station tick on the alignment.
- Specify next point: This engages the station offset transparent command.
- Select alignment: Select the baseline alignment.
- Specify station along baseline: Snap to the minor/major station tick.
- Specify station offset: Snap to an offset that goes past the matchline.
- Esc Esc
- Trim the lines to the matchline
- Home Tab > Modify Panel > Trim
- Commandline: Cutting Edges
- Select objects: Select the matchline alignments.
- Trim: Select the overhangs of the dimension lines.

 Add dimensions
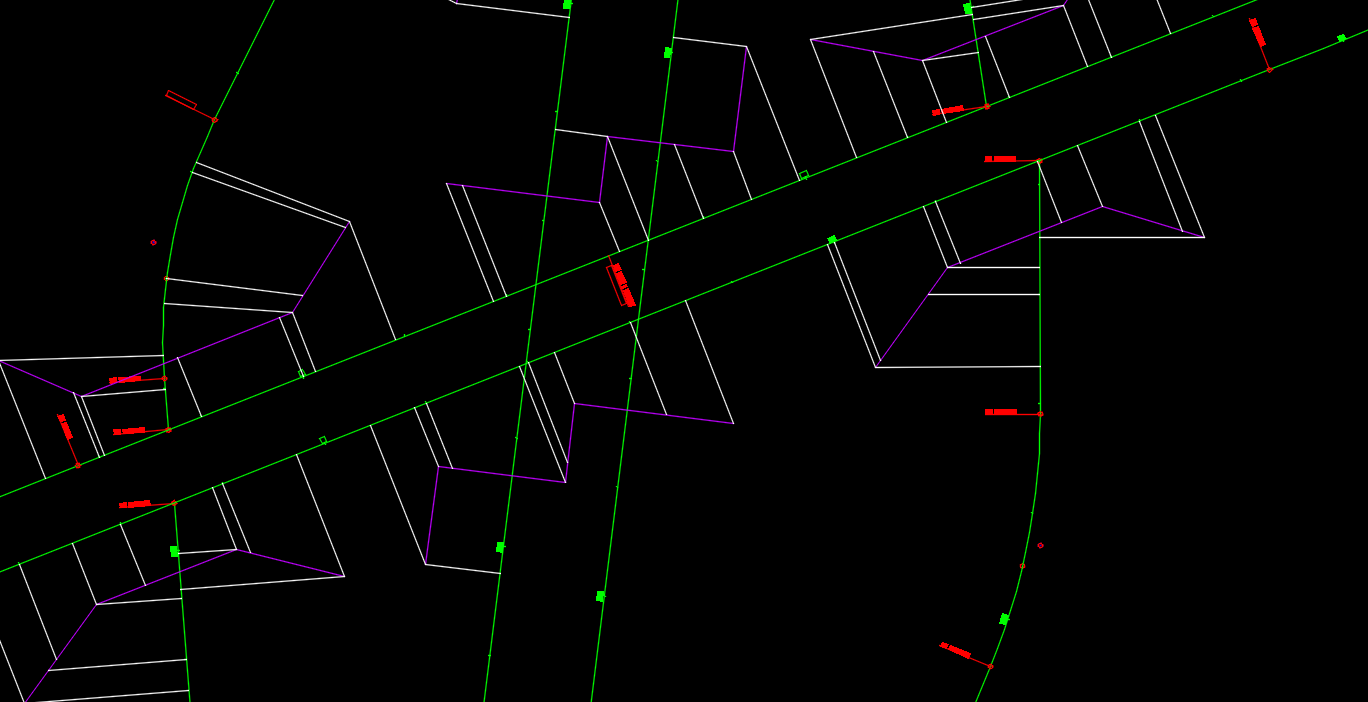
Once the dimension lines are established, the dimension lines need to be labeled
- WisDOT Sheets Tab > Annotation panel > Dimension Style drop-down
- 060-PLAN JOINTS_NO DIM LINES
- Dimension drop-down > Aligned
- To place a dimension, click the Aligned button
- Specify first extension line origin: Select one end of a dimension line.
- Specify second extension line origin: Select other end of a dimension line.
- Specify dimension line location: Select one end of the dimension line to locate the dimension label.
- Repeat for all dimension lines
- Adjust the label locations
- Select the label
- Mouse over the rip near the label
- Move Text Only
 Add labels
Label stations of matchline vertices
Only station labels are needed at dimension lines that don’t line up with an alignment label tick.
- Annotate Tab > Labels & Tables Panel > Add Labels
- Add Labels dialog
- Feature: Alignment
- Label Type: Station Offset - Fixed Point
- Station offset label style: Station - Truncated
- Marker style: <none>
- Add
- Select alignment: Select the baseline alignment.
- Specify point: Select the end point of the dimension line nearest the baseline alignment.
- Adjust label location
- Select the label
- Use the square grip to adjust the label location.
Label matchlines
Add a “M/L” label on each matchline
- Annotate Tab > Text Panel > Multiline text drop-down > Single Line
- Specify start point of text: Select a point on the matchline.
- Specify paper height: 0.07 or 0.06 Enter
- Specify rotation angle of text: Select another point on the matchline.
- Enter Text: M/L
- Click another location in model space to finalize the text.
- Esc
- Repeat for other matchlines
- Adjust label locations using the label grips.
 Add view frames
View frames will be used to produce the plan sheets. Typically, matchline detail sheets are only needed for interchanges and complex intersections. Depending the annotation scale used, it is possible only one view frame is needed at each intersection, or more than one view frame will be needed. Utilize the station range in the Create View Frame wizard to adjust the number of view frames created.
- Output tab > Plan Production ribbon > Create View Frames
- Alignment
- Alignment: Main roadway alignment
- Station Range: Specify a short station range within the complex intersection.
- Next
- Sheets: Sheet Settings
- Sheet Type: Plan(s) only
- Template: Click
- C:\WisDOT\Stnd\C3D20##\Templates\Sheets\02-PD-wdot.dwt
- Layout template: Plan 1 IN 200 FT Depends on desired scale of the plan sheet.
- OK
- View Frame Placement: Along alignment
- Next
- View Frame Group:
- Name: VFG - Scale - XM - AliName - Desc (VFG - 200 - XM - 8 - Int51)
- Next
- Matchlines
- Insert matchlines: Unchecked
- Create View Frames
- Alignment
- Adjust the view frame to surround the intersection area
- Select the view frame
- Click the square grip and move to surround the intersection/interchange area.
- Click the green circle grip to rotate the view frame.
- Repeat for remaining intersections/interchanges.
 Create Sheets
- Create a sheet set if one has not been created.
- Output tab > Plan Production panel > Create Sheets
- View Frame Group and Layouts
- View Frame Group: VFG - Scale - XM - AliName-DescSelect the view frame group to create sheets from.
- Layout Creation: All layouts in the current drawing
- Layout name: <[Next Counter]>
- Choose the north arrow block to align: SheetWizard-NorthArrow
- Next
- Sheet set
- Add to existing sheet set: checked
- Click
- Choose the already existing sheet set: 1590-14-00.dst
- Create Sheets
- OK
- View Frame Group and Layouts
- Home tab > Palettes drop-down > Sheet Set Manager to open Sheet Set Manager
- Rename the newly created subset.
- Right-click the Subset > Rename Subset
- Name: CROSS SECTION matchlineS - Intersection/Interchange description
- The name of the subset will affect the title block information on the plan sheets.
- Move the CROSS SECTION matchlineS - Intersection/Interchange description subset within the 02- Subset. More subsets can be created to further organize the plan sheets.
- Rename the newly created subset.
- Save the drawing to make the changes take affect.
- Open the detail sheet layout.
- Review the title block for proper naming. The page title will be filled with the name of the sheet set subset.
- Move the north arrow into an open space on the page.
- Repeat steps 2-6 for remaining interchange/intersection cross section matchline detail sheets.
Tip: If the view frame is adjusted after the sheet is created, the sheet will need to be deleted and re-created. Alternatively, the sheet viewport can be adjusted using the WisDOT Sheet Tools - Align Viewport tool.