InfraWorks Model Builder
Last updated: 2026-01-06
Total video time: 4:20
iwx-lvl01-mdl-bldr-01.mp4 6:25
Create a model
- Home screen > select Model Builder...
- Model Builder window
- Model space is an interactive map
- Mouse wheel to scroll
- Left-click to pan around
- + and - symbols to zoom in and out
- Map dropdown to choose road view or aerial view.
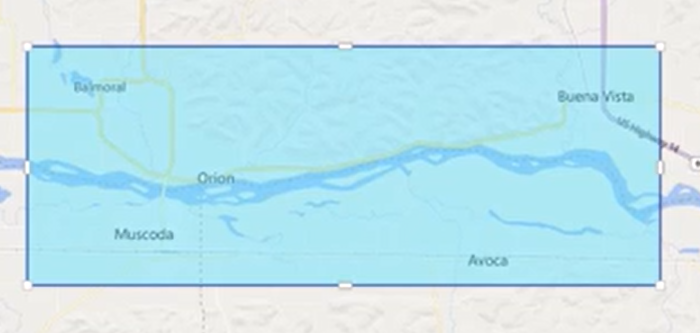
- Area of Interest
- Area Selection bar: enter in a location
- Type Gotham, WI
- Area Selection by current view (maximum of 200 sq km), rectangle, polygon, or insert a polygon.
- Select Draw a rectangle to select an AOI and draw out the model area.
- Select Draw a rectangle to select an AOI and draw out the model area.
- Model Name: enter in the name for the model area
- Type WisDOT-Training Video
- Add description: optional, additional 1000 character description to further define the model
- Coordinate System: must be selected and cannot be changed after model is created.
- Select Name Selected
- Select Coordinate System dialog box
- Select WI83-CF
- OK
- Create Model
- Area Selection bar: enter in a location
- Model space is an interactive map
- Message: We are preparing your new model Close
- X to close Model Builder window
Info: You will receive an email when it is finished.
Open created model
- Home screen > Recent > select WisDOT-Training Video
- Message: Where would you like to store the Model Builder model? BIM360
- Select a BIM 360 Project Folder dialog box
- Browse to ...WisDOT Videos\Project Files\Infraworks Model Builder
- OK
Info: It may take any where for 4-20 minutes to download depending on model size. When it's done downloading there will be terrain, water features, roads, buildings and everything else it collected.
(BIM360 and Project Admin) 4:20