Introduction to InfraWorks webinar
Last updated: 2022-12-13
Total video time: 42:17
Info: This webinar was presented to WisDOT staff. It's purpose was to introduce WisDOT staff to the capabilities of InfraWorks and to provide a framework about how to think about different models generated from InfraWorks and their appropriate uses. People outside of WisDOT may find useful information in this topic.
Warning: This topic contains no information on requirements or mandates of usage of InfraWorks on WisDOT projects by consultants. It should be used for information only by people outside the Department.
 Introduction and level of accuracy
iwx-intro-wbinr-01.mp4 10:34
The inception of Autodesk Infraworks into WisDOT for visualization purposes.
- What is visualization
- The representation of and object, situation or set of information as a chart or other image.
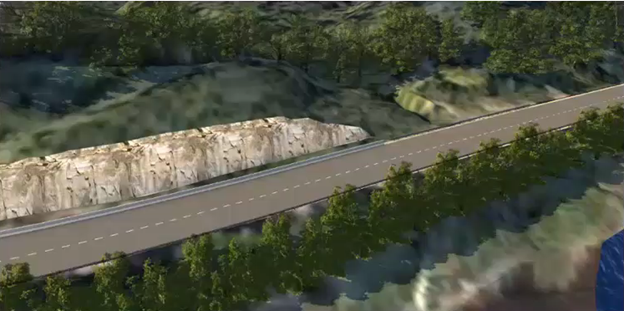
Plan view of a corridor in Civil 3D
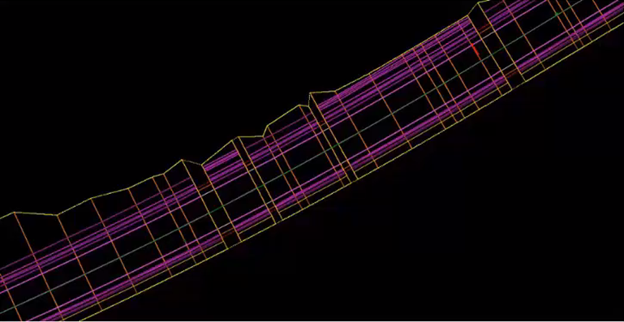

Conceptual View of same corridor in Infraworks

- With visualization it is easier to convey an idea to someone who is not in our field.
- The representation of and object, situation or set of information as a chart or other image.
- Infraworks is that visualization tool
- Convey a set of 2D plans in a 3 dimensional world
- Convey multiple ideas in one model
- Produce a fly through video to help illustrate the model
- Infraworks levels of accuracy- How precise geographically an object is placed in the model.
- Low Accuracy
- Using Infraworks by itself and other free data
- Created for the purpose of internal meetings
- Early stages of design
- Drawn manually or placed free handed
- Noncritical features
- Medium Accuracy
- Using Pre-DSR Civil 3D and Infraworks data
- Created for the purpose of internal or public meetings
- Early stages of planning
- Tied to a coordinate system
- Features from Pre-DSR
- Examples of data to bring in: Civil-D drawing, IMX files, LandXML, or GIS SHP/SDF files
- High Accuracy
- Using Post-DSR Civil 3D and GIS data
- Created for the purpose of internal of public meetings
- Final stages of planning or production
- Tied to a coordinate system
- Features from Post-DSR
- Examples of data to bring in: Civil-D drawing, IMX files, LandXML, or GIS SHP/SDF files
- Low Accuracy
- Infraworks levels of detail - How refined.
Level of detail and their intent
- Level 1
- Sketch or layout of ideas in the early planning stage and collaboration
- Time: 1 day or less to build
- Software Infraworks
- Containing simple representations of roadways, buildings, water features, signs, etc.
- Not including right-aways or grading challenges
- Intent is to convey and share ideas
- Level 2
- Meeting proposals and designs that have moved past the conceptual stage
- Time: multiple days to several weeks to complete
- Software: Infraworks, Civil 3D, GIS Data
- Objects have higher detail; including corridors from Civil 3D, GIS information, street lamps, cars or people
- Could include a video fly through
- Intent is to show the complete idea or plan in its entirety within the 3D model
- Level 3
- Time: several weeks or a month to build model
- Software: 3DS Max, Video Editing, Post production processing
- Highly professional, photo-realism; importing the model into 3DS Max or another video editing software
- Additional animations; people walking, cars driving on the road, lighting features to create light and shadows
- Combining Level of Accuracy with Level of Detail
- Possible to have high LOA with low LOD
- Possible to have low LOA with high LOD
- In the end we want a high LOA with a high LOD
Building a level 1 model
iwx-intro-wbinr-03.mp4 05:44
Create Model
- Home screen > open Model Builder...
- Area Selection toolbar
- Search a location: type Gotham, Wisconsin
- Select Draw a Rectangle
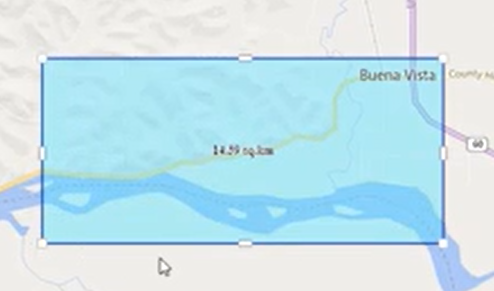

- Model Name: type Model Name
- Description: this is optional
- Coordinate System: If unsure, select LL84
- Select Create Model
- Message: We are preparing your new model. Continue
Info: You will receive an email when it is finished.
Open created model
- Home screen > Recent > select Model Name
- Message: Where would you like to store the Model Builder model? select Local
Info: It may take any where for 4-20 minutes to download depending on model size. When it's done downloading there will be terrain, water features, roads, buildings and everything else it collected.
Edit model properties
- Infraworks toolbar > select Application Options
- Application Options dialog box
- Unit Configuration
- Default Units: Imperial
- Type: Feet
- Decimals: 2 (0.00)
- Unit Configuration
- OK
- Application Options dialog box
- Ribbon > Manage tab > select Model Properties
- Model Properties dialog box
- User Coordinate System: select Globe , scroll and select RichlandWI.F
- Apply
- OK
- Model Properties dialog box
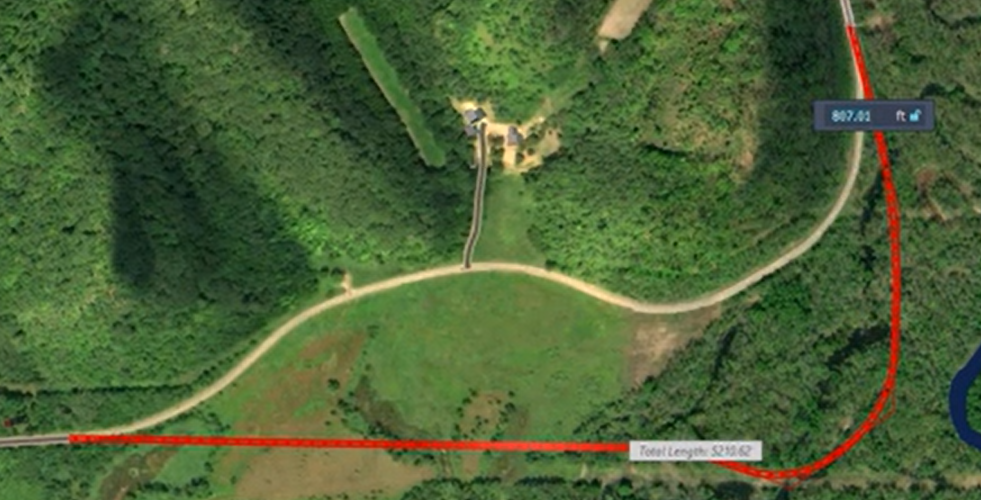
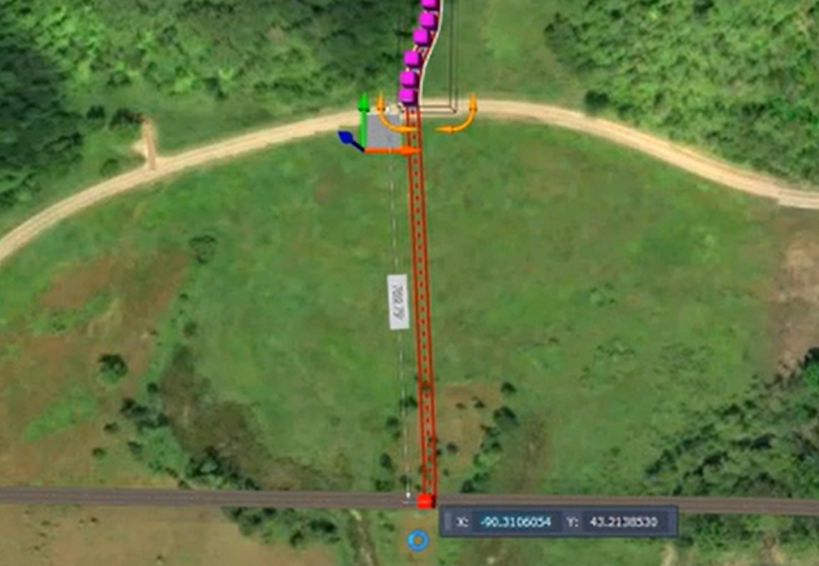
Split the road
Info: In a level 1 drawing you don't have be to careful about where the road goes you will be able to adjust that in Level 2.
- Decide to start and end points of the split
- Right-click start point > Split feature
- Right-click end point > Split feature
- Delete the center
- Draw new road
- Ribbon > Create tab > Transportation panel > select Planning Road
- Select a Draw Style
Left-click at start point, continue clicking along the path to the end point
Connect existing roadwork
- Select any existing roads
- Left-click red end grip point and drag to new aligned road, creating an intersection
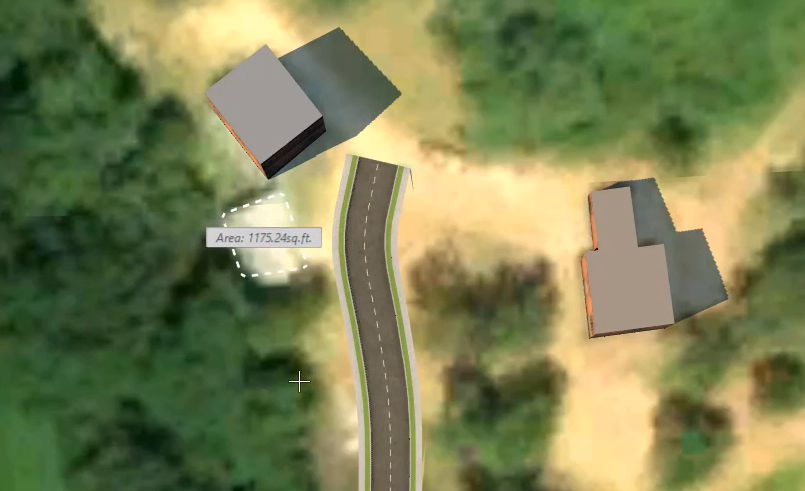
Add generic building
- Zoom to existing road to the north that has other buildings
- Ribbon > Create tab > Structures panel > select Building
- Select a Draw Style
- Trace the shape of the building
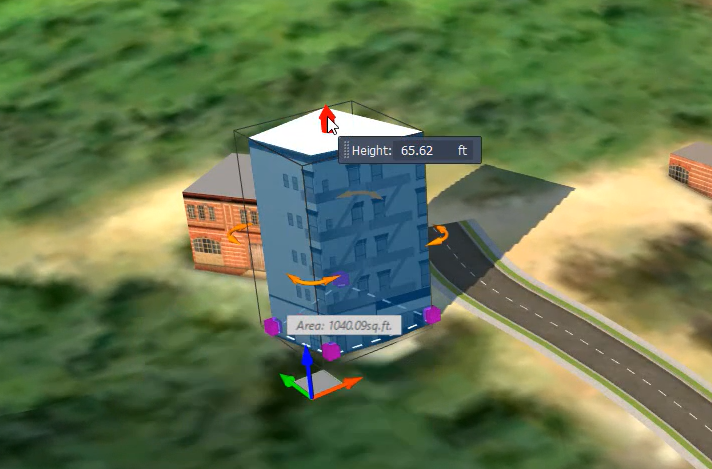
- Edit generic building
- Select the building and use arrows to edit the dimensions
- Use Building palette to edit building properties; such as name, facade color, roof slope, and roof material.
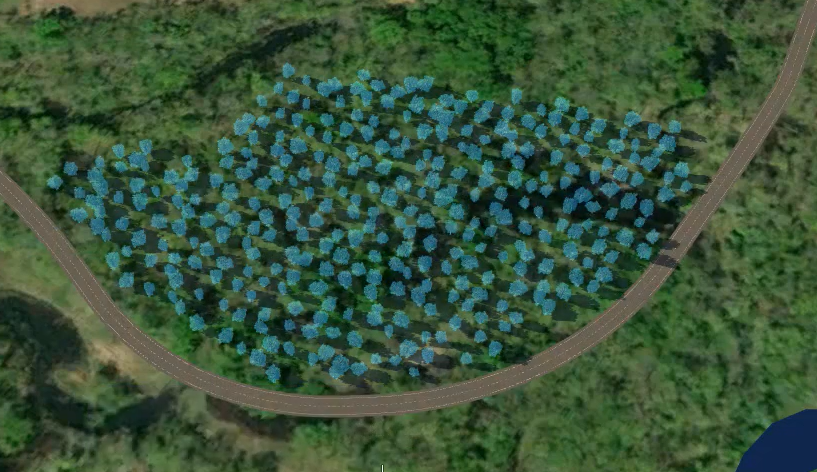
Add stand of trees
- Zoom to curve of new aligned road
- Ribbon > Create tab > Environment panel dropdown > select Stand of Trees
- Draw a polyline/outline along the north edge of curve, returning back to start point
- Edit tree models
- Single-click a tree or double-click to select all of the trees
- Use scroll bar to adjust the density
- Arrows to adjust height
- Use tree palette to edit other properties
-
Repeat process to south edge of curve

Add vehicles
- Ribbon > Create tab > Environment panel > select City Furniture
- Select Draw Style > select Silver Compact Car
- Select a place on the road
- Use arrows to align or rotate
- Use Window Copy/Paste commands (Ctrl+C, Ctrl+V) to duplicate
- Use the City Furniture palette to change the style of vehicle
Duplicate objects to make other objects
- Car to tree
- Select object to change
- City Furniture palette > Manual Style > More Styles
- Select 3D Model Style dialog box
- Dropdown > select 3D Model/Vegetation
- Select a tree
- OK
- Select 3D Model Style dialog box
- Car to person
- Select object to change
- City Furniture palette > Manual Style > More Styles
- Select 3D Model Style dialog box
- Dropdown > select 3D Model/People
- Select a person
- OK
- Select 3D Model Style dialog box
Tip: It is quicker to copy and past the same object to place in the model and then use the style palette to change the color or type of car and even to change the car into a tree, person, etc.
Info: Remember the focus is not accuracy. Just conveying the idea.
Adding a Storyboard to the model
Ribbon > Present/Share tab
- Present panel
- Storyboard Creator - opens Storyboard tool
- Storyboard Player - plays the storyboards
- Watermarks - add watermark to your videos or images
- Share panel
- Export 3D Model - exports files to .fbx, .dae, or .obj formats
- Export IMX - exports in IMX format
- Export FGDB - exports to a Esri file geodatabase (.gdb)
- Ribbon > Present/Share tab > select Storyboard Creator > Storyboard tool > select Camera Path Animation button dropdown
- Select Create from Component Road to create a camera path
- Select Add an Animation to create camera movement, such as looking left or right, to create crane or orbit animations.
Building a level 2 model
iwx-intro-wbinr-04.mp4 06:08
To make a Level 2 model start with a Level 1 model and more accurate data
- Export an IMX file from Civil 3D
- Ribbon > Output tab > Export panel > select Export IMX
- Configure the road
Set the coordinate system

Give the road a Rule Style

- Corridor is accurately placed in the model based on the coordinate system
- Configure the Surface
The terrain from the USGS is not always the most accurate

Configure the terrain from the imported IMX file

- This will give you the terrain that is realistic not +/- 30'
- Alternatively import the Civil 3D drawing directly
- Configure the settings to confirm the correct coordinate system
The imported road comes in as a design road with limited variables

Convert the road to a component road

Adjust the width and slope of the lanes

- Add components to the road
- Add a lane and adjust to 4' width
- Add a gravel shoulder
Adjust the material to look like gravel

- Add a jersey wall
Split the jersey wall to make room for a field entrance

- Split the gravel shoulder
- Adjust the gravel width to match the jersey wall
- Add a guard rail to the other side
Adjust spacing and rotation of the guard rail

Set seam offset to 1' so rail is on top of gravel

- Adjust the road from fixed width to fixed slope
- Adjust the grading limit to fall outside the design limits
- You can split the grading area
Add a transition from 3:1 to 4:1

Add to the library to use again without have to build again

Trimble warehouse models
iwx-intro-wbinr-05.mp4 07:44
Trimble warehouse is a great location to get models that are more realistic
- Insert model from Trimble warehouse
- Use search key to find things like an old barn
- Download
- Open in free software Sketchup Make
- Unlock and delete the ground
- Export as a Collada model (.dae)
Place in model

- Create a new Proposal view for each design option
- Copy the master for each Proposal
Make changes in the different proposals independent of the other views


-
Bookmarks allow you to save views and jump back and forth between specific views

-
Adjust the Sun and Sky

-
Add a Watermark


Summary and next steps at WisDOT
iwx-intro-wbinr-06.mp4 06:42
- Visualization can be broken down into two concepts
- Level of Detail (LOD)
Level of Accuracy (LOA)

- What else can Infraworks do
- Structure Design
- Drainage Analysis (requires cloud credits)
- Culvert Design (standards-driven)
- Intersection Design (rules-driven)
- Traffic Analysis
- Profile Optimization (requires cloud credits)
- Earthwork quantity Generation
- And a host of other things
- Starting an early adopter deployment to run through early 2018
- Starts now or when you have a suitable project until group is full
- Other functional areas such as Survey, Utilities, Traffic...
- Up to 50 early adopters- depending on project type and location
- Check with your supervisor if you think Infraworks would be suitable and you want to become an early adopter
- Send and email to support.cae@dot.wi.gov
- We'll send you a questionnaire about your project and goals
- Once you're selected we'll arrange for the software to be installed
- Licensing
- Our current licensing structure allows for 3 named users per license
- This is not a pool license. Each user will be assigned a license
- This may change with the next license renewal
How to become a WisDOT early adopter
iwx-intro-wbinr-07.mp4 05:56
- User Expectations
- Participate in follow-up meetings and user groups
- Give feedback on challenges, successes and share with other users
- Test updates and help develop content
- Be an active participant
- What happens once its installed
- Basic standards and workflows will be available to help you get started but early adopters will be guiding our standards development as they work through their projects
- Technical support will be available through a visualization email address similar to the CAE Support email you use for Civil 3D and provided by our consultant partner CTC Technologies
- You'll receive regular correspondence from MDU asking for your input on a variety of things such as standards and workflows
- You'll attend user group/ follow-up meetings to help us understand your needs and share your insights with other users
- I want to learn Infraworks but I don't have a suitable project
- There is a free 30 day trial version of Infraworks if you don't have a project that is suitable for the early adopter program. You will have to make arrangements through your supervisor to have it installed.
- If you install the trial version and later want to move to the licensed version, you will not lose all your previous work if you set up your account using you WisDOT email address.
- Check with your supervisor if you think Infraworks would be suitable and you want to become an early adopter
- Send and email to support.cae@dot.wi.gov
- We'll send you a questionnaire about your project and goals
Once you're selected we'll arrange for the software to be installed
