Migrating blocks between Civil 3D versions
Last updated: 2015-04-17
It is good practice when migrating blocks to insert them into a blank out-of-the-box template. This way we avoid saving forward any old settings contained in the drawings within which these older blocks reside. Depending on the scale of migration we can accomplish this a couple of different ways.
 Workflow 1 – Migrating a small number of blocks
- Start a new block library drawing using the out-of-the-box acad.dwt template found here:
C:\Users\<user name>\appdata\local\autodesk\c3d 2014\enu\template
- Insert older blocks using Design Center
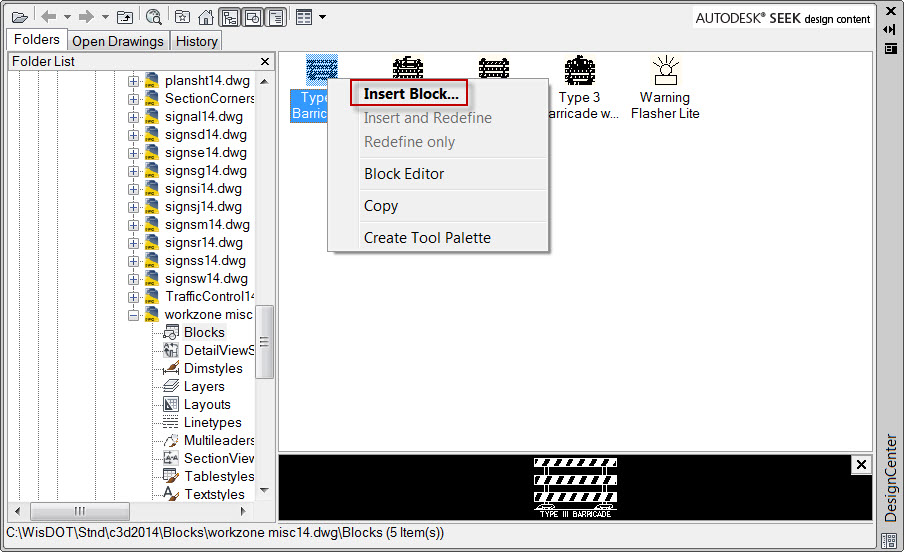
- Open Design Center, and browse to the source drawing containing the blocks to be migrated. The reason this workflow is designed for migrating a small number of blocks is because Design Center only allows one block to be inserted at a time. That is not ideal for migrating hundreds of blocks, but it does work well for smaller numbers.
Open the Blocks section in the source drawing in Design Center, and drag each block into model space one at a time. Otherwise, right-click on each block and choose Insert Block.
- Save the new block library drawing in the appropriate location with the appropriate name, and the newly migrated blocks are now ready to be used.
Workflow 2 – Migrating many blocks
- Start a new block library drawing using the out-of-the-box acad.dwt template found here:
C:\Users\<user name>\appdata\local\autodesk\c3d 2014\enu\template
- Insert and explode existing block library drawing
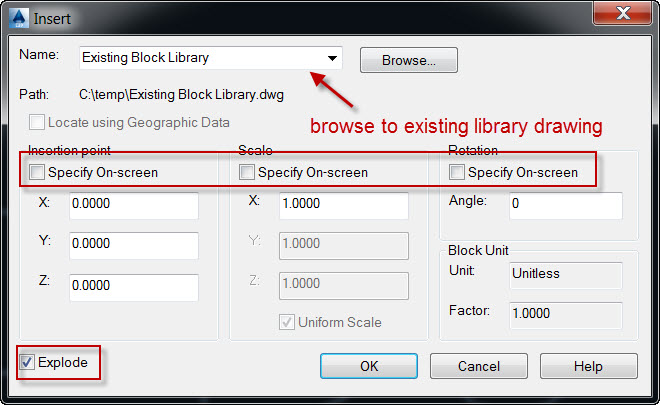
Click on the Insert tab of the Ribbon and then select the Insert button on the Block panel. In the Insert dialog box browse to the existing block library drawing you wish to migrate. Be sure that the Insertion point, Scale, and Rotation options are all unchecked. Be sure the Explode option is checked on. This will insert the entire drawing into the new 2014 drawing template and will explode into its individual objects.
- Next we will run a few commands in order to clean unwanted items out of the new block library drawing.
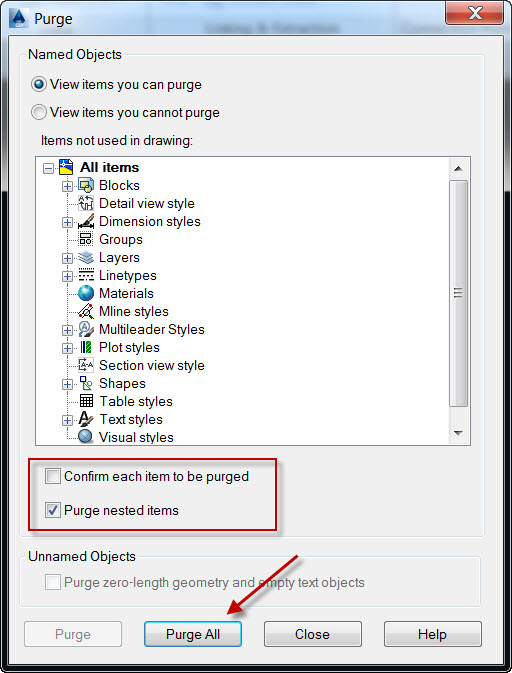
- Type PURGE in the command line. Be sure that the option for Confirm each item to be purged is unchecked and that the option for Purge nested items is checked on. Click on the Purge All button, and close the dialog box when the command is finished.
- Type –PURGE in the command line. Type R to select the option Regapps. Hit enter to select the default asterisk for name of regapps to purge. This will select all regapps. Type N when prompted to verify each name to be purged. This will get rid of any 3rd party apps running in the background.
- Type AUDIT in the command line. Type Y when prompted to fix any errors detected in the drawing.
- Type PURGE in the command line. Be sure that the option for Confirm each item to be purged is unchecked and that the option for Purge nested items is checked on. Click on the Purge All button, and close the dialog box when the command is finished.
- Save the new block library drawing in the appropriate location with the appropriate name, and the newly migrated blocks are now ready to be used.