Intersection edgeline geometry creation
Last updated: 2025-10-17
Total video time: 25:28
 Insert south intersection dynamic block
Exercise files: ali-int-edglin-geom-creat-01-data-C3D16.zip
- Open Crdr-Int-CthE-RiverRd.dwg
- Home tab > Layer panel> Layer Properties
- New Layer

- Name new Layer P_Int_Block_NPLT
- Mark the Plot Column.
- Close the Layer Manager box.
- Open the WisDOT Design tab.
- Palettes ON/OFF

- Parametric Design panel > Intersection Blocks
Tip: Refer to SDD 9a1: At-Grade Side Road Intersections for type A, B1, B2, C, and D.
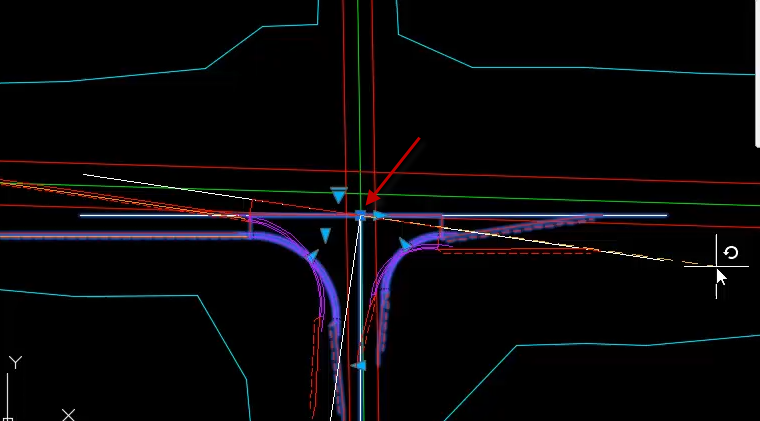
- Int-Type-B-Tan
- Hover near where the south-main road alignment crosses the center line of the secondary road.
- Shift + right-click > Apparent Intersect
- Snap to that point.
- Shift + right-click > Apparent Intersect
Adjust south intersection dynamic block
Exercise files: ali-int-edglin-geom-creat-02-data-C3D16.zip
- Open Crdr-Int-CthE-RiverRd.dwg
- Select on the block.
- Hover over dark blue origin grip point, left-click.
- Right-click > Rotate
- Shift + right-click > Nearest
- Snap to the edge of roadway.
- Right-click > Rotate
- Left click the blue directional arrow.
- Shift + right-click > Nearest
- Snap to the center-line of the secondary road.
- Select block.
- Right-click > Properties
- Scroll to Custom field.
- SRLaneWidth = 10
- W = 15
- Right-click > Properties

- Close the Palette.
Insert north intersection dynamic block and make adjustments
Exercise files: ali-int-edglin-geom-creat-03-data-C3D16.zip
- Open Crdr-Int-CthE-RiverRd.dwg
- Intersection Layout palette > Int-Type-B-Tan
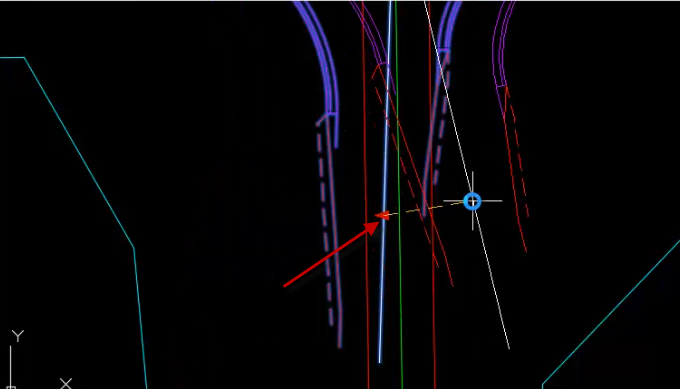
- Shift+ right click > Apparent Intersect
- Snap to north edge lane.
- Select on the block.
- Left-click in grip edit.
- Right-click > Rotate
- Shift + right-click > Nearest
- Snap to west-side of line.
- Left click the blue directional arrow.
- Shift + right-click > Nearest
- Snap to the center-line of the secondary road.
- Select block.
- Right-click > Properties
- Scroll to Custom field.
- SRLaneWidth = 10
- W = 15
- Esc
- Select blocks.
- Home tab > Layer panel > Layer Manager pull-down menu
- Select the P_Int_Block_NPLT layer
Create curb and gutter edge lines for NW and NE quadrants
Exercise files: ali-int-edglin-geom-creat-04-data-C3D16.zip
- Open Crdr-Int-CthE-RiverRd.dwg
- Home tab > Create Design > Alignment > Alignment Creation Tools
- Change the name to Int-CthE-RiverRd-NW-CG.
- Change the Alignment style to RDWY Curb&Gutter Flange.
- Change the Alignment label set to _No Labels.
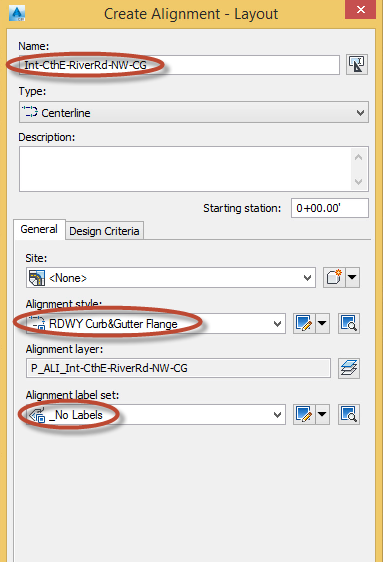
- OK
- Line Tool > Fixed Line (Two Points).
- O-Snap to the top of the North-West intersection.
- O-Snap to the end of the curve.
- Right-click to set the points.
- Curve Tool > Fixed Curve (Three Points)
- O-Snap to the start of the curve.
- Shift + right-click > Midpoint
- Select the endpoint of the curve
- Right-click to set the points.
- Line Tool > Fixed Line (Two Points)
- O-Snap to the end of the curve.
- Shift + right-click > Endpoint
- Select the endpoint of the line
- Right-click to set the points.
- Home tab > Create Design > Alignment > Alignment Creation Tools
- Change the name to Int-CthE-RiverRd-NE-CG.
- Leave the rest of the selections as is.
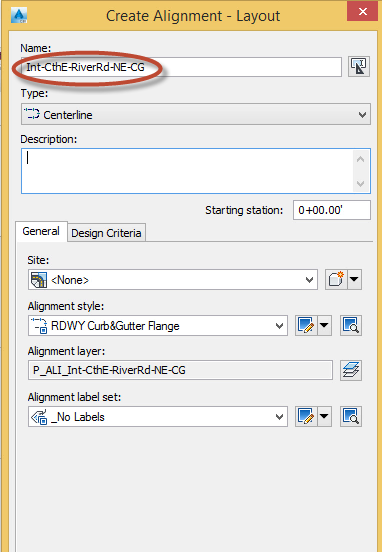
- OK
- Line Tool > Fixed Line(Two Points)
- O-Snap to the bottom of the North-East intersection.
- O-Snap to the end of the curve.
- Right-click to set the points.
- Curve Tool > Fixed Curve(Three Points)
- O-Snap to the end of the curve.
- Shift + right-click > Midpoint
- Select the start of the curve.
- Right-click to set the points.
- Line Tool > Fixed Line (Two Points)
- O-Snap to the end of the curve.
- Shift + right-click > Endpoint
- Select the endpoint of the line
- Right-click to set the points.
Create curb and gutter edgelines for SW and SE quadrants
Exercise files: ali-int-edglin-geom-creat-05-data-C3D16.zip
- Open Crdr-Int-CthE-RiverRd.dwg
- Home tab > Create Design > Alignment > Alignment Creation Tools
- Change the name to Int-CthE-RiverRd-SW-CG
- Change the Alignment style to RDWY Curb&Gutter Flange
- Change the Alignment label set to _No Labels
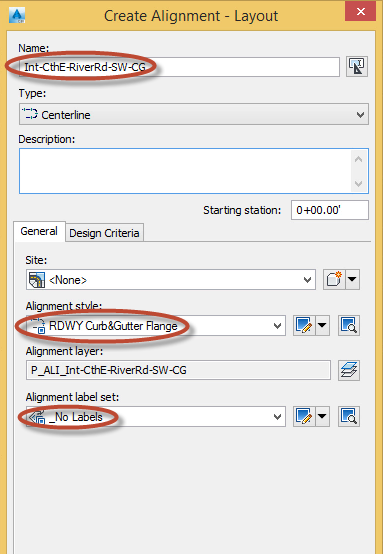
- OK
- Line Tool > Fixed Line (Two Points).
- O-Snap to the start of the South-West intersection.
- O-Snap to the end of the curve.
- Right-click to set the points.
- Curve Tool > Fixed Curve (Three Points)
- O-Snap to the start of the curve.
- Shift + right-click > Midpoint
- Select the endpoint of the curve.
- Right-click to set the points.
- Line Tool > Fixed Line (Two Points)
- O-Snap to the end of the curve.
- Shift + right-click > Endpoint
- Select the endpoint of the line
- Right-click to set the points.
- Home tab > Create Design > Alignment > Alignment Creation Tools
- Change the name to Int-CthE-RiverRd-SE-CG.
- Leave the rest of the selections as is.
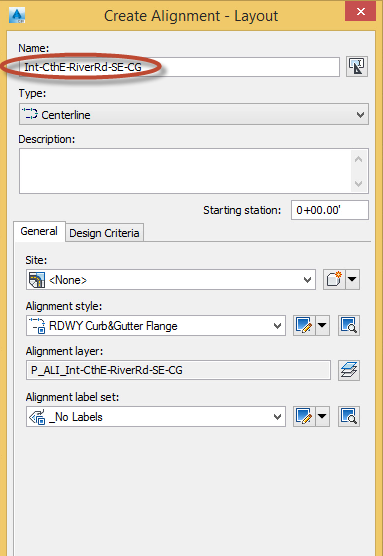
- OK
- Line Tool > Fixed Line (Two Points)
- O-Snap to the bottom of the South-East intersection.
- O-Snap to the end of the curve.
- Right-click to set the points.
- Curve Tool > Fixed Curve(Three Points)
- Shift + right-click > Midpoint
- Select the start of the curve.
- Right-click to set the points.
- Line Tool > Fixed Line (Two Points).
- O-Snap to the end of the curve.
- Shift + right-click > Endpoint
- Select the endpoint of the line
- Right-click to set the points.
Create CthE ETW edgelines
Exercise files: ali-int-edglin-geom-creat-06-data-C3D16.zip
- Open Crdr-Int-CthE-RiverRd.dwg
- Home tab > Create Design > Alignment > Alignment Creation Tools
- Change the name to CthE-L-ETW.
- Change the Alignment style to RDWY Pavement Edge.
- OK
- Tan-Tan(No Curves)

- On the north side of CTH E, endpoint OSNAP to:
- the west end of the lane transition.
- the west transition line connects to the NW curb and gutter
- the east transition line connects to the NE curb and gutter
- the east transition meets the ten foot extension of the NE curb and gutter
- the widened lane transition ends
- the bend in the transition lane
- east end of the widened lane transition
- the east end of the ten foot transition extension
- Right-click to end the Draw Tangent command.
- Close the toolbar.
- Home tab > Create Design > Alignment > Alignment Creation Tools
- Change the name to CthE-R-ETW.
- OK
- Tan-Tan(No Curves)
- on the south side of CTH E, endpoint OSNAP to:
- the west end of the ten foot extension of the lane transition.
- the west end of the transition line
- the west transition line bend
- the west transition meets the ten foot extension of the SW curb and gutter
- the west transition line connects to the SW curb and gutter
- the east transition line connects to the SE curb and gutter
- the east transition meets the ten foot extension of the NE curb and gutter
- the widened lane transition ends
- the east end of the ten foot transition extension
- Right-Click to end the Draw Tangent command.
- Close the toolbar
Create CthE EPS edgelines
Exercise files: ali-int-edglin-geom-creat-07-data-C3D16.zip
- Open Crdr-Int-CthE-RiverRd.dwg
- Home tab > Create Design > Alignment > Alignment Creation Tools
- Change the name to CthE-L-EPS
- Change the Alignment style to RDWY Shoulder Paved.
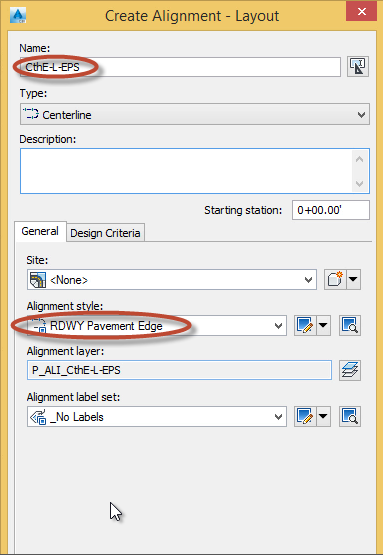
- OK
- Tan-Tan(No Curves)
- Snap to the end of the paved shoulder, end of the transition, end of the line.
- Right-Click to lock in the points.
- Close the tool bar.
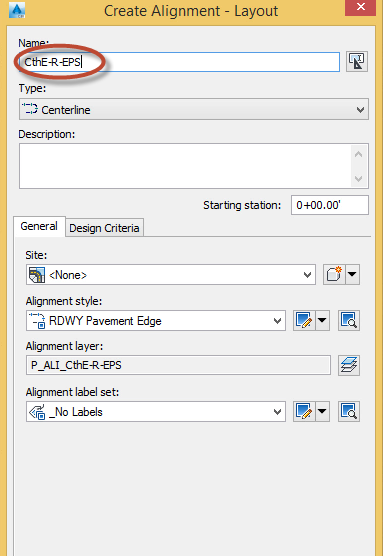
- Home tab > Create Design > Alignment > Alignment Creation Tools
- Change the name to CthE-R-EPS
- OK
- Snap to the end of the lane, the end of the transition, and the end of the paved shoulder.
- Right-Click to lock in the points.
- Close the tool bar.
Create CthE EGS edgelines
Exercise files: ali-int-edglin-geom-creat-08-data-C3D16.zip
- Open Crdr-Int-CthE-RiverRd.dwg
- Home tab > Create Design > Alignment > Alignment Creation Tools
- Change the name to CthE-L-EGS
- Change the Alignment style to RDWY Shoulder Aggregate.
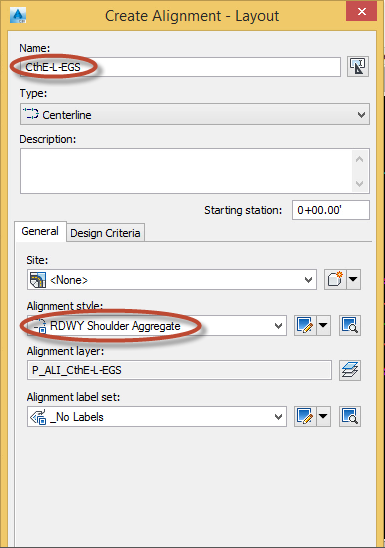
- OK
- Tan-Tan(No Curves)
- On the north side of CTH E, endpoint OSNAP to:
- the west end of the EGS line.
- the west EGS line bends before the NW curb and gutter
- the west EGS connects to the NW curb and gutter
- the east EGS connects to the NE curb and gutter
- the east EGS transition bend
- the east end of the EGS line
- Right-Click to end the Draw Tangent command.
- Close the toolbar.
- Home tab > Create Design > Alignment > Alignment Creation Tools
- Change the name to CthE-R-EGS.
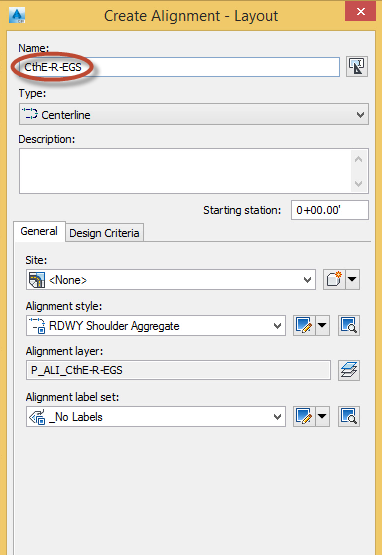
- OK
- Tan-Tan(No Curves)
- On the south side of CTH E, endpoint OSNAP to:
- the west end of the EGS
- the west EGS bend in transition line
- the west end of the EGS where it matches the SW curb and gutter
- the east end of the EGS where it matches the SE curb and gutter
- the east EGS line bends after the SE curb and gutter
- east end of the EGS line.
- Right-Click to end the Draw Tangent command.
- Close the tool bar.
Create RiverRd ETW edgelines
Exercise files: ali-int-edglin-geom-creat-09-data-C3D16.zip
- Open Crdr-Int-CthE-RiverRd.dwg
- Home tab > Create Design > Alignment > Alignment Creation Tools
- Change the name to RiverRd-L-ETW.
- Change the Alignment style to RDWY Shoulder Aggregate
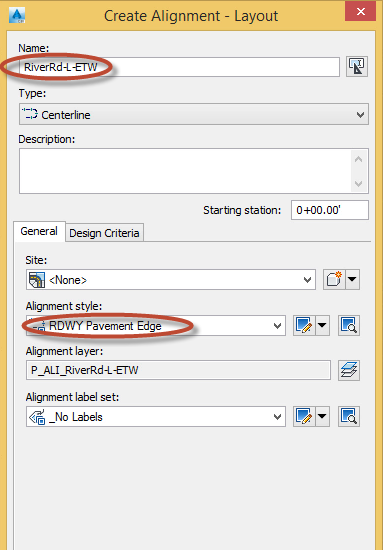
- OK
- Tan-Tan(No Curves)
- Starting at the south end
- snap to the end of the extension
- snap to the beginning of the transition
- snap to the end of transition.
- Jump to the other side
- snap to where it touches the curve
- snap to where it returns back to the pavement
- snap to the end of the extension
- snap to the end of the 10 foot extension.
- Right-Click to lock in the points.
- Close the tool bar.
- Home tab > Create Design > Alignment > Alignment Creation Tools
- Change the name to RiverRd-R-ETW.
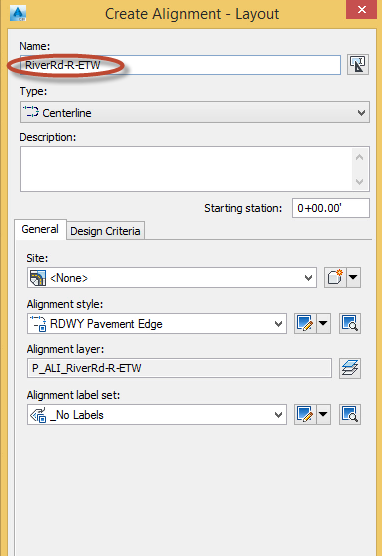
- OK
- Tan-Tan(No Curves)
- the south end of the ETW at the 10' extension
- the south end of the transition lane line
- the south end where the transition line meets the SW curb and gutter
- the north end where the transition line meets the curb and gutter
- the north end where the transition meets the 10' extension of the curb and gutter
- the north end of transition line
- the north end f the 10' extension of the transition line
- Right-Click to end the Draw Tangent command.
- Close the toolbar.
Create RiverRd EGS edgelines
Exercise files: ali-int-edglin-geom-creat-10-data-C3D16.zip
- Open Crdr-Int-CthE-RiverRd.dwg
- Home tab > Create Design > Alignment > Alignment Creation Tools
- Change the name to RiverRd-L-EGS.
- Change the Alignment style to RDWY Shoulder Aggregate
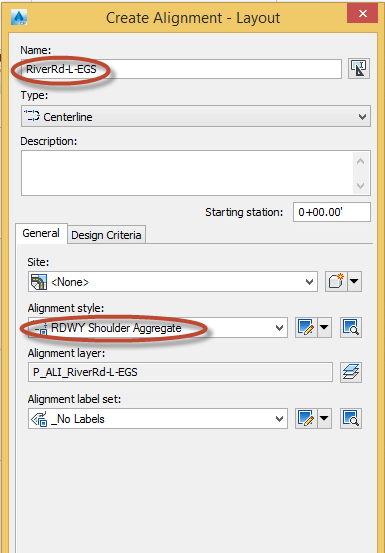
- OK
- Tan-Tan(No Curves)
- on the west side of River Rd, endpoint OSNAP to:
- the south end of the EGS
- the south end where the EGS line meets the SW curb and gutter
- the north end where the EGS line meets the curb and gutter
- the north end of the EGS
- Right-click to end the Draw Tangent command.
- Close the toolbar.
- Home tab > Create Design > Alignment > Alignment Creation Tools
- Change the name to RiverRd-R-EGS.
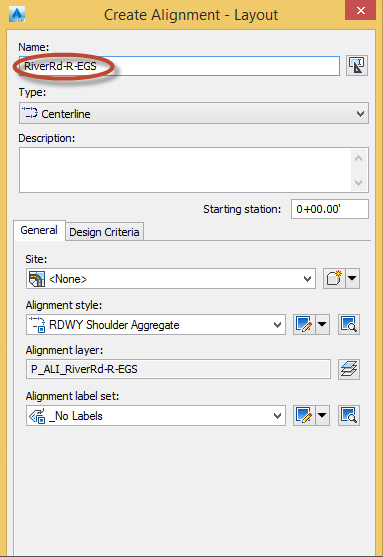
- OK
- Tan-Tan(No Curves)
- on the east side of River Rd, endpoint OSNAP to:
- the south end of the EGS
- the south end where the EGS line meets the SW curb and gutter
- the north end where the EGS line meets the curb and gutter
- the north end of the EGS
- Right-Click to end the Draw Tangent command.
- Close the toolbar
Create layers for edgeline alignments
Exercise files: ali-int-edglin-geom-creat-11-data-C3D16.zip
- Home tab > Layer panel > Layer Properties
- New Layer

- Name the new layer P_RDWY_LaneEdge-L.
- Enter
- Create another new layer.
- Name this new layer P_RDWY_LaneEdge-R.
- Enter
- Create another new layer.
- Name this new layer P_RDWY_ShldAgg-L.
- Enter
- Create another new layer.
- Name this new layer P_RDWY_ShldAgg-R.
- Enter
- Create another new layer.
- Name this new layer P_RDWY_ShldPaved-L.
- Enter
- Create another new layer.
- Name this new layer P_RDWY_ShldPaved-R.
- Enter
- Close the Layer Properties manager.
Assign edgeline alignments to layers
Exercise files: ali-int-edglin-geom-creat-12-data-C3D16.zip
- Left-Click on the north side of CTH E and the west side of River Rd
- Right-click > Properties
- Select the Layer pull-down.
- Select P_RDWY_LaneEdge-L
- ESC
- Select the south side of CTH E and the east side of River Rd.
- With both selected Right-click > Properties
- Select the Layer pull-down.
- Select P_RDWY_LaneEdge-R
- ESC
- Select the paved shoulder west of CTH E.
- With both selected Right-click > Properties
- Select the Layer pull-down.
- Select P_RDWY_ShldPaved-L
- ESC
- Select the paved shoulder on the left hand side of CTH E.
- With both selected Right-click > Properties
- Select the Layer pull-down.
- Select P_RDWY_ShldPaved-R
- ESC
- Select the shoulder aggregate left of CTH E and the shoulder aggregate west side of River Rd.
- With both selected Right-click > Properties
- Select the Layer pull-down.
- Select P_RDWY_ShldAgg-L
- ESC
- Select the shoulder aggregate right of CTH E and the shoulder aggregate east side of River Rd.
- With both selected Right-click > Properties
- Select the Layer pull-down.
- Select P_RDWY_ShldAgg-R.
- ESC
- Select all the Curb&Gutter radii.
- With both selected Right-click > Properties
- Select the Layer pull-down.
- Select P_RDWY_C_and_G.
- ESC
- Close out the Properties Dialogue box.
Create data shortcuts
Exercise files: ali-int-edglin-geom-creat-13-data-C3D16.zip
- Open Crdr-Int-CthE-RiverRd.dwg
- Save
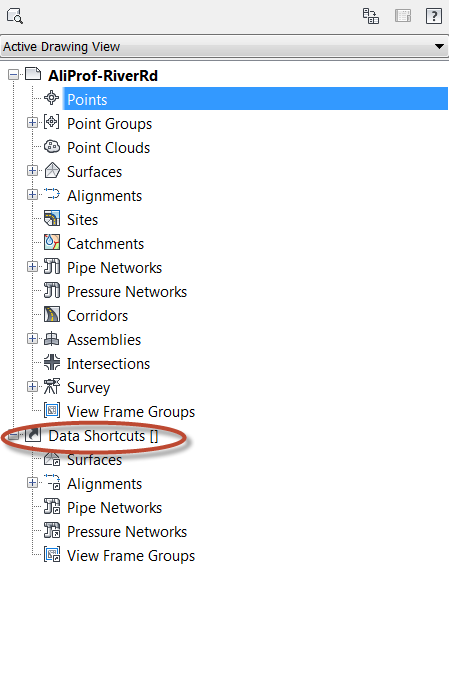
- Prospector > Right-click on Data Shortcuts [] > Create Data Shortcuts
- Click on Centerline Alignments to select all the alignments.
- OK
Mask CthE ETW and EGS edgelines in intersection
Exercise files: ali-int-edglin-geom-creat-14-data-C3D16.zip
- Open Crdr-Int-CthE-RiverRd.dwg
- Select on the north ETW alignment.
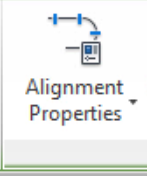
- Home tab > Modify panel> Alignment Properties
- Go to the Masking tab.
- Create Masking Station.
- Endpoint Snap to:
- ETW where it matches to the NW curb and gutter
- ETW where it matches to the NE curb and gutter.
- OK
- ESC
- Select on the north EGS alignment.
- Go to the Masking tab
- Create Masking Station.
- Endpoint Snap to:
- EGS where it matches to the NW curb and gutter
- EGS where it matches to the NE curb and gutter.
- OK
- ESC
- Select on the south ETW alignment.
- Endpoint Snap to:
- ETW where it matches to the NW curb and gutter
- ETW where it matches to the NE curb and gutter.
- OK
- ESC to release the ETW.
- Endpoint Snap to:
- Select on the south EGS alignment.
- Endpoint Snap to:
- EGS where it matches to the NW curb and gutter
- EGS where it matches to the NE curb and gutter.
- Endpoint Snap to:
- OK
- ESC to release the EGS
Mask RiverRd ETW and EGS edgelines in intersection
Exercise files: ali-int-edglin-geom-creat-15-data-C3D16.zip
- Open Crdr-Int-CthE-RiverRd.dwg
- Select on the River Rd west ETW alignment.
- Home tab > Modify panel> Alignment Properties
- Go to the Masking tab.
- Create Masking Station.
- Endpoint Snap to where the west ETW line intersects the SW curb and gutter.
- Endpoint snap to where the west ETW line intersects the NW curb and gutter.
- OK
- ESC
- Select on the River Rd east ETW alignment.
- Home tab > Modify panel> Alignment Properties
- Go to the Masking tab.
- Create Masking Station.
- Endpoint Snap to where the west ETW line intersects the SE curb and gutter.
- Endpoint snap to where the west ETW line intersects the NE curb and gutter.
- OK
- ESC
- Select on the River Rd west EGS alignment.
- Home tab > Modify panel> Alignment Properties
- Go to the Masking tab.
- Create Masking Station.
- Endpoint Snap to where the west EGS line intersects the SW curb and gutter.
- Endpoint snap to where the west EGS line intersects the NW curb and gutter.
- OK
- ESC
- Select on the River Rd east EGS alignment.
- Home tab > Modify panel> Alignment Properties
- Go to the Masking Tab.
- Create Masking Station.
- Endpoint Snap to where the east EGS line intersects the SE curb and gutter.
- Endpoint snap to where the east EGS line intersects the NE curb and gutter.
- OK
- ESC
Mask curb return extensions
Exercise files: ali-int-edglin-geom-creat-16-data-C3D16.zip
- Beginning in the Northwest Quadrant select on the alignment.
- Home tab > Modify panel> Alignment Properties
- Go to the Masking tab.
- Create Masking Station.
- Starting at the North end of the block
- Endpoint Snap to the beginning of the curb return extension.
- Endpoint snap to where the curb return actually begins.
- Create Masking Station.
- From the South end of the block.
- Endpoint snap to where the curb return actually begins.
- Snap to the beginning of the curb return extension.
- OK
- ESC
- Beginning in the Northeast Quadrant select on the alignment.
- Home tab > Modify panel> Alignment Properties
- Go to the Masking tab.
- Create Masking Station.
- Starting at the east end of the block
- Endpoint Snap to the beginning of the curb return extension.
- Endpoint snap to where the curb return actually begins.
- Create Masking Station.
- From the North end of the block.
- Endpoint snap to where the curb return actually begins.
- Snap to the beginning of the curb return extension.
- OK
- ESC
- Beginning in the Southwest Quadrant select on the alignment.
- Home tab > Modify panel> Alignment Properties
- Go to the Masking tab.
- Create Masking Station.
- Starting at the west end of the block
- Endpoint Snap to the beginning of the curb return extension.
- Endpoint snap to where the curb return ends.
- Create Masking Station.
- From the South end of the block.
- Endpoint snap to where the curb return ends.
- Snap to the beginning of the curb return extension.
- OK
- ESC
- Beginning in the Southeast Quadrant select on the alignment.
- Home tab > Modify panel> Alignment Properties
- Go to the Masking tab.
- Create Masking Station.
- Starting at the South end of the block
- Endpoint Snap to the beginning of the curb return extension.
- Endpoint snap to where the curb return ends.
- Create Masking Station.
- From the South end of the block.
- Endpoint snap to where the curb return actually begins.
- Snap to the beginning of the curb return extension.
- OK
- ESC
- Home tab > Layers panel> Layer pull down
- Type in P_Int_Block_NPLT
- Freeze the layer
- Save
Edit CthE geometry and linework
Exercise files: ali-int-edglin-geom-creat-17-data-C3D16.zip
- Open Crdr-Int-CthE-RiverRd.dwg
Tip: This is only to show the edit process, should that be necessary. This will not be part of the regular creation workflow.
- Home tab > Layer panel > Layer Panel Pull-down
- Find the P_Int_Block_NPLT layer and thaw it.
- Select on the northern block.
- Right-click > Properties
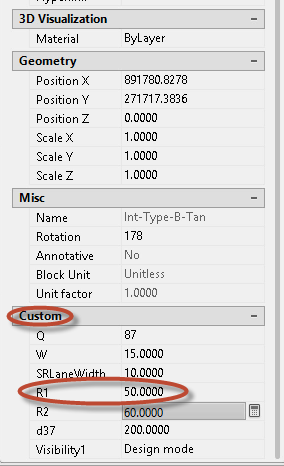
- Scroll down to Custom.
- R1 = 50
- Close the window.
- ESC to let go of the block.
- Select on the block.
- Select on the alignment for the curb-return.
- Grab the end point of the alignment and move it to the end.
- Grab the end of the straight portion and move it to the end of the curb.
- On the top half of the block grab the end point of the alignment and move it to the end.
- Grab the end of the straight portion and move it to the end of the curb.
- Select on the ETW.
- Move the end of the ETW to the intersection point.
- Select on the EGS.
- Move the top end point to the end of the EGS line.
- Move the end point to where the EGS line matches the curb and gutter.
- ESC
- Select (2:30 Mark)
- Snap overlap to the end of the block.
- Snap the corner to the end of transition.
- ESC
- Select the EGS and snap that to the end of the EGS line.
- Repeat the steps for the top half of the curve.
Edit RiverRd geometry and linework and masks
Exercise files: ali-int-edglin-geom-creat-18-data-C3D16.zip
- Open Crdr-Int-CthE-RiverRd.dwg
- Select on the ETW.
- Select on the end point of the ETW an move it to the end of the transition.
- Move the ETW match point to curb to the new location of the end of the curb.
- ESC
- Select on the EGS line.
- Select on the end point of the EGS and move it to the end of the transition.
- Move the EGS match point with the curb to the new location of the end of the curb.
- ESC
- Select on the West EGS alignment.
- Home tab > Modify panel> Alignment Properties
- Click on the Masking tab.
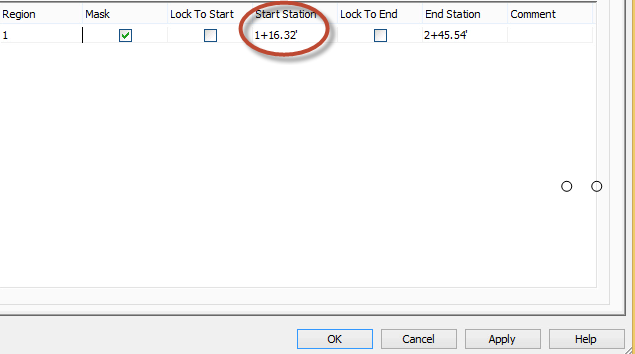
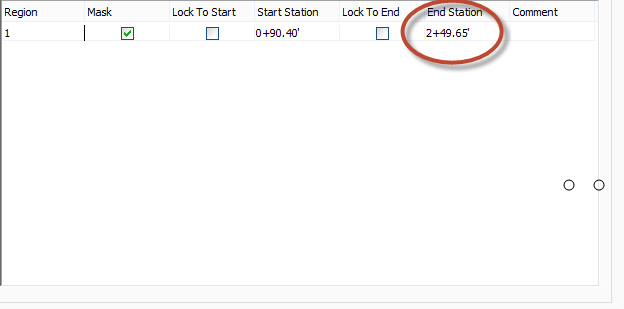
- Select the Start Station inside Region 1.
- Select from Screen Icon.
- Endpoint OSNAP to the end of the curb and gutter.
- OK
- ESC
- Select on the West ETW alignment.
- Home tab > Modify panel> Alignment Properties
- Click on the Masking tab.
- Select the Start Station inside Region 1.
- Select from Screen Icon.
- Endpoint OSNAP to the end of the curb and gutter
- OK
- ESC
- Select on the North ETW alignment.
- Home tab > Modify panel> Alignment Properties
- Click on the Masking tab.
- Select on the North EGS alignment.
- Select the Start Station inside Region 1.
- Select from Screen Icon.
- Select back of curb endpoint.
- OK
- ESC
- Select on the North EGS alignment.
- Home tab > Modify panel> Alignment Properties
- Click on the Masking tab.
- Select the End Station inside Region 1.
- Select from Screen Icon.
- Select back of curb endpoint.
- OK.
- ESC
- Grab the end of the EGS alignment and snap it to the new location of the end of the EGS.
- ESC
- Grab the ETW alignment and snap it to the new location of the end of the ETW.
- ESC
- Home tab > Layer panel > Layer Panel Pull-down
- Type P_Int_Block_NPLT and select the sunshine icon to freeze the block.